
Easily Expand Your Wi-Fi with Wi-Fi Mesh | Webinar
September 10, 2024
The Myth of Bonding | Webinar
October 10, 2024
Step-by-Step Tutorial: Configuring Hot Failover with SpeedFusion Using InControl
1. Introduction
- 00:00: Welcome to the Peplink University video. The goal is to configure hot failover with SpeedFusion using InControl.
2. Initial Setup
- 00:10: Gather your equipment:
- Primary Hub Router: 2400 or 244 SDX
- Secondary SDX Router
- Field Routers
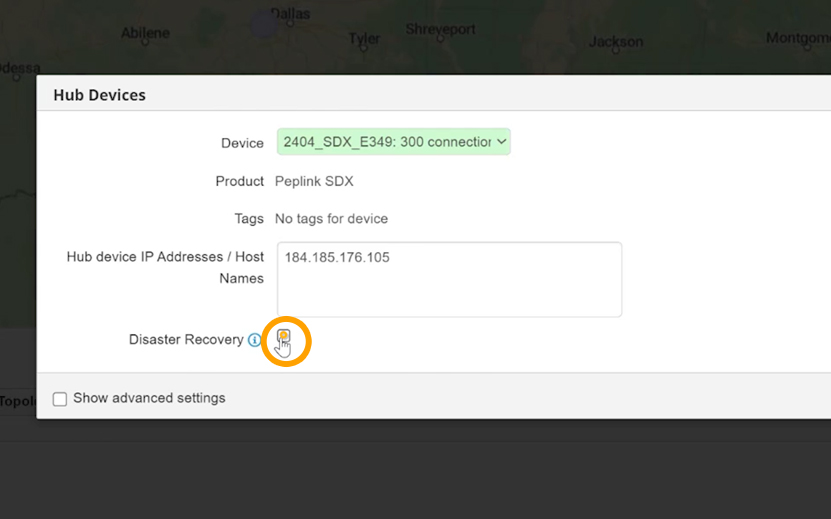
3. SpeedFusion Configuration
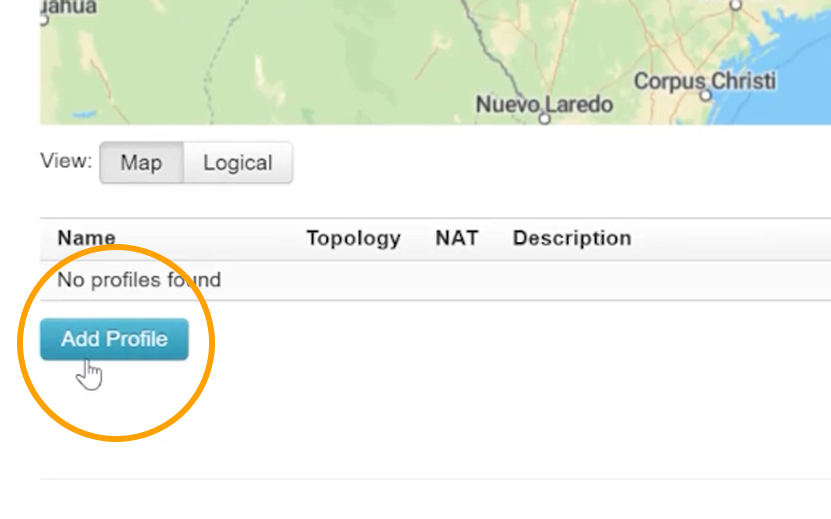
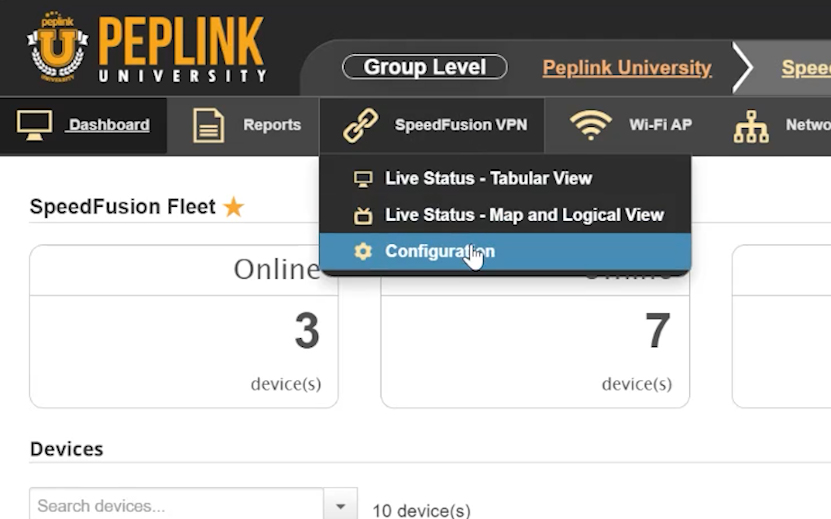
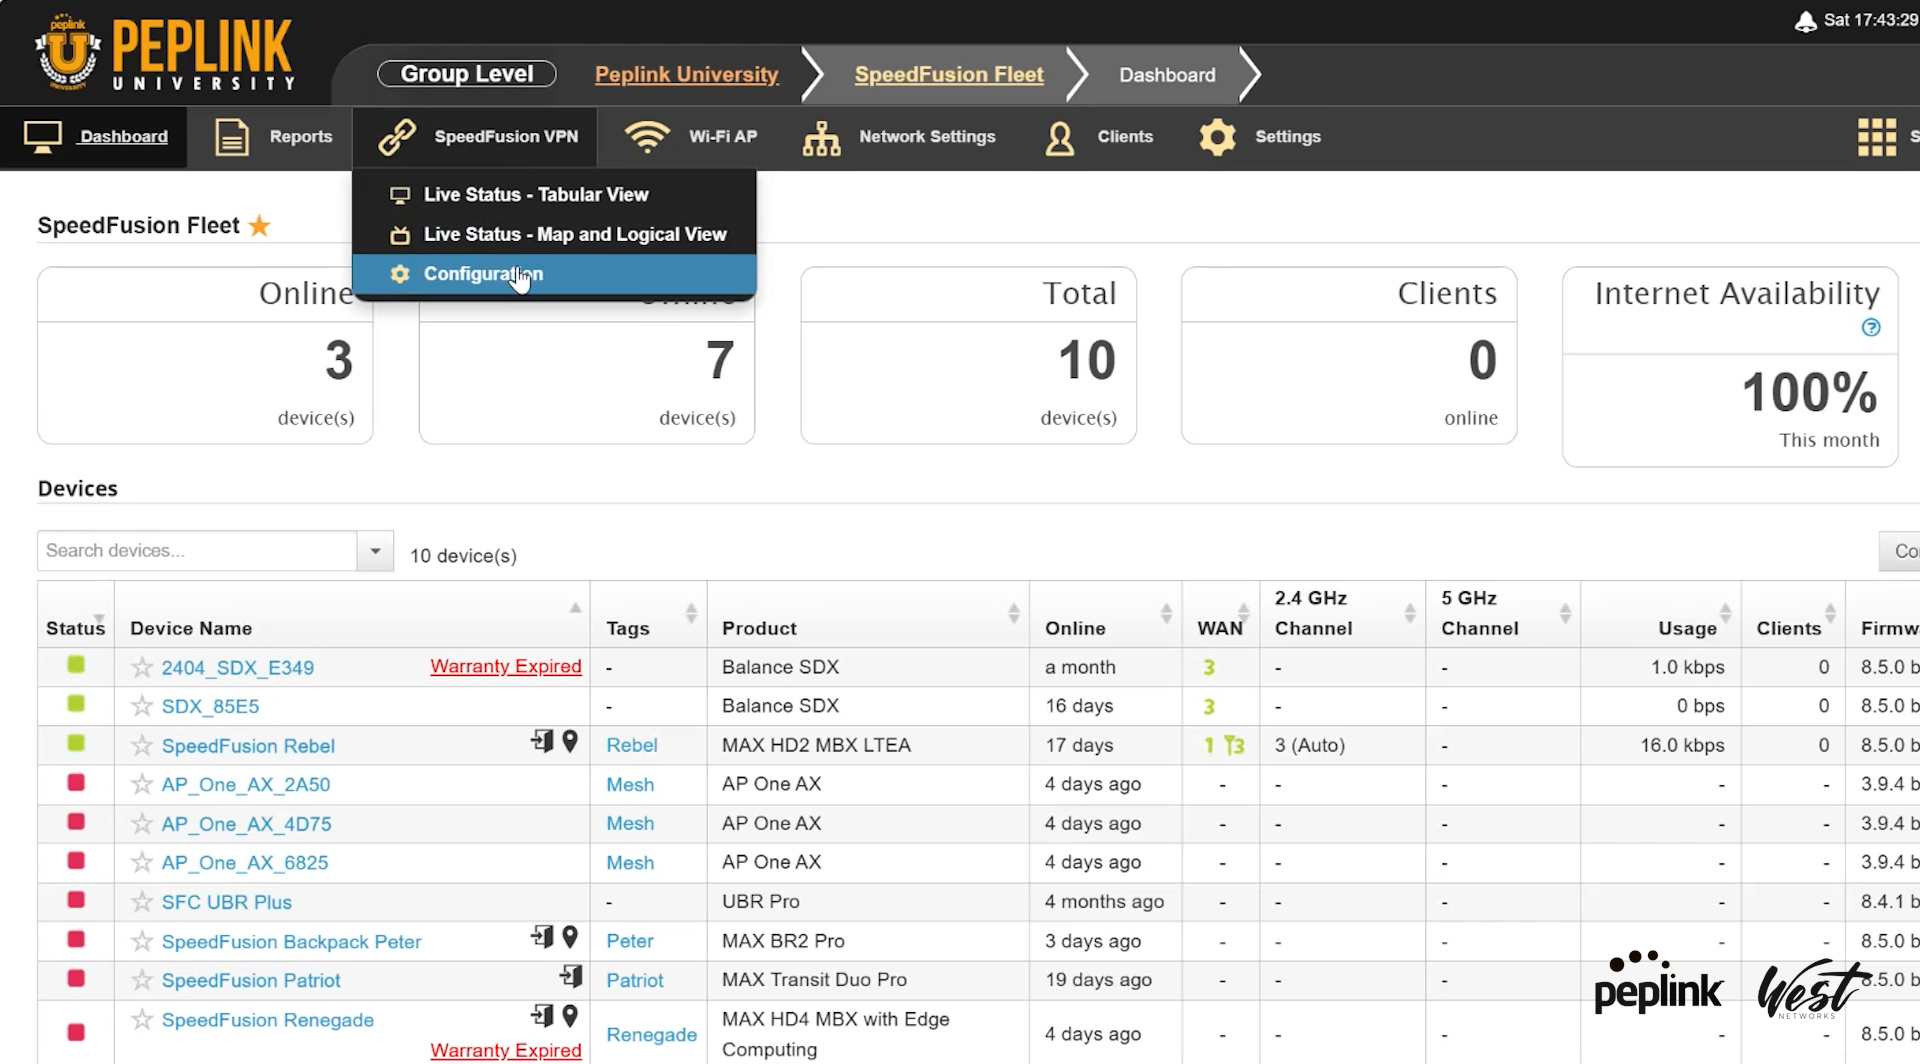
- 00:20: Navigate to SpeedFusion configuration.
- 00:25: Create a new profile:
- Click on “Add Profile”
- Name the profile (e.g., Disaster Recovery)
- Select the primary and secondary SDX routers for disaster recovery.
4. Adding Field Routers
- 00:46: Add field routers to the profile:
- Select routers like Rebel, Patriot, Renegade, Backpack, and UBR.
- Name the profile (e.g., SpeedFusion).
- Disable encryption for faster internet bonding.
5. Advanced WAN Settings
- 01:00: Access advanced settings:
- Scroll down to “WAN Settings” and click on “Advanced WAN Settings”.
- Locate and configure the Rebel router settings:
- Set Starlink as primary (WAN 1).
- Set cellular connections as secondary (WAN 2).
6. Configuring WAN Priorities
- 01:55: Set WAN connection priorities per profile:
- Configure each router’s WAN settings individually.
- Save the settings.
7. Additional Router Configurations
- 02:19: Optionally, configure additional routers (e.g., Backpack).
- Ensure all settings are correct.
- Enable Dynamic Weighted Bonding and TCP Ramp Up.
8. Error Correction Settings
- 02:39: Enable Adaptive Forward Error Correction (FEC) to mitigate packet loss.
- Save the changes.
9. Finalizing Configuration
- 03:09: Save and apply the configuration changes.
- Verify the changes on the dashboard.
10. Testing Failover
- 03:49: Test the failover setup:
- Reboot the primary WAN (e.g., Starlink).
- Ensure traffic seamlessly switches to the secondary WAN (e.g., cellular).
11. Conclusion
- 04:14: Confirm the setup works as intended.
- Thank you for watching the demonstration.


-

- Step-4-add-profile
-

- Step-2-Configuration-menu
mattwestwn
Graphic Designer at West Networks
Related posts


June 20, 2025
