
InControl2 – Adding & Removing Groups
August 9, 2021
Webinar | What’s new in Firmware 8.3.0!
January 18, 2023
Installing Windows Server Using Peplink KVM
Welcome to another video from West Networks! We're going to be talking about KVM virtualization inside of an EPX. Watch as we Install Windows Server using Peplink KVM. What we want to do is deploy KVM virtual hypervisor virtual machines inside of an EPX or SDX pro.
Have a Hard Drive Installed:
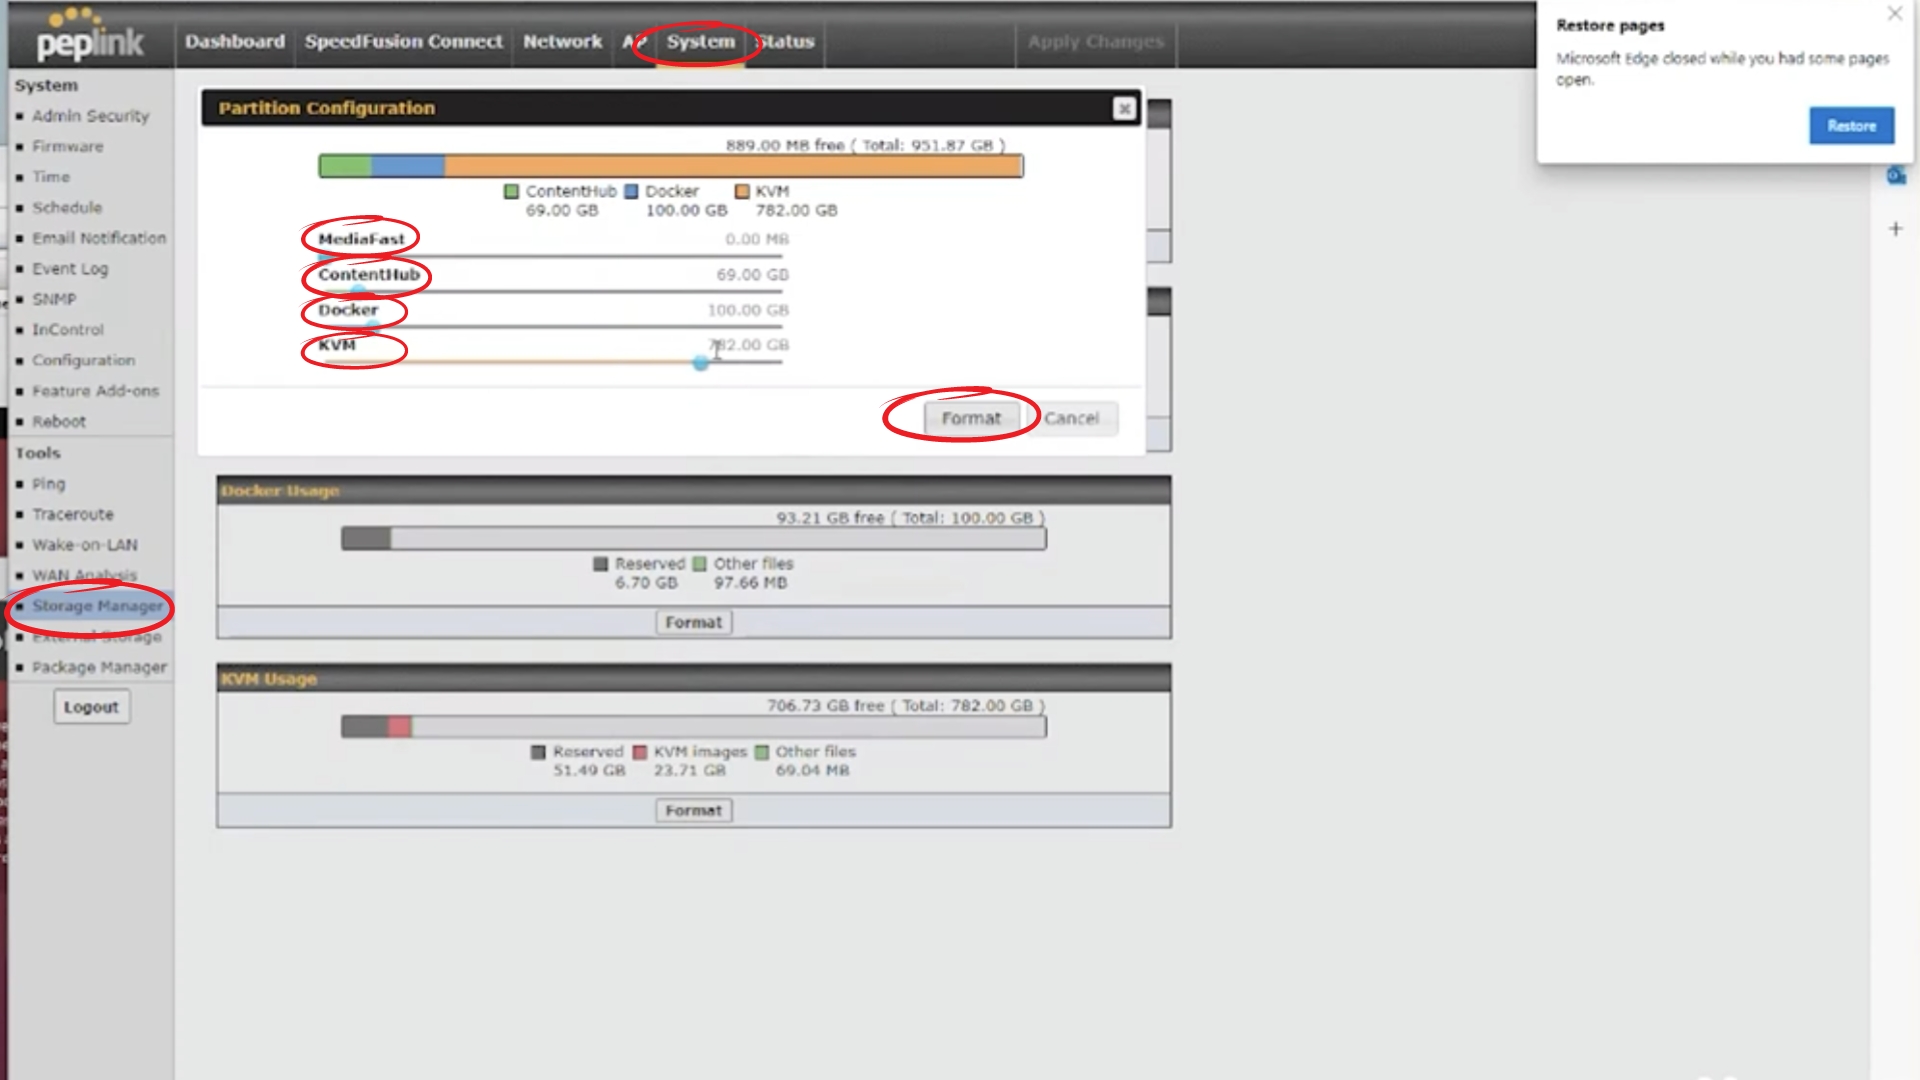
- Go to the top menu in your router, click "System"
- In the left menu, click "Storage Manager"
- Under "Partition", click "Configure"
- Here you can see Peter has 782 GB assigned to KVM, Docker at 100 GB, ContentHub at 69 GB, and MediaFast at 0 MB
- Click "Format"
Enable KVM:
- In the top menu, click "Network"
- In the left menu, click "KVM"
- Click the checkbox to enable KVM
- Save and Apply Changes

Virtual Machine:
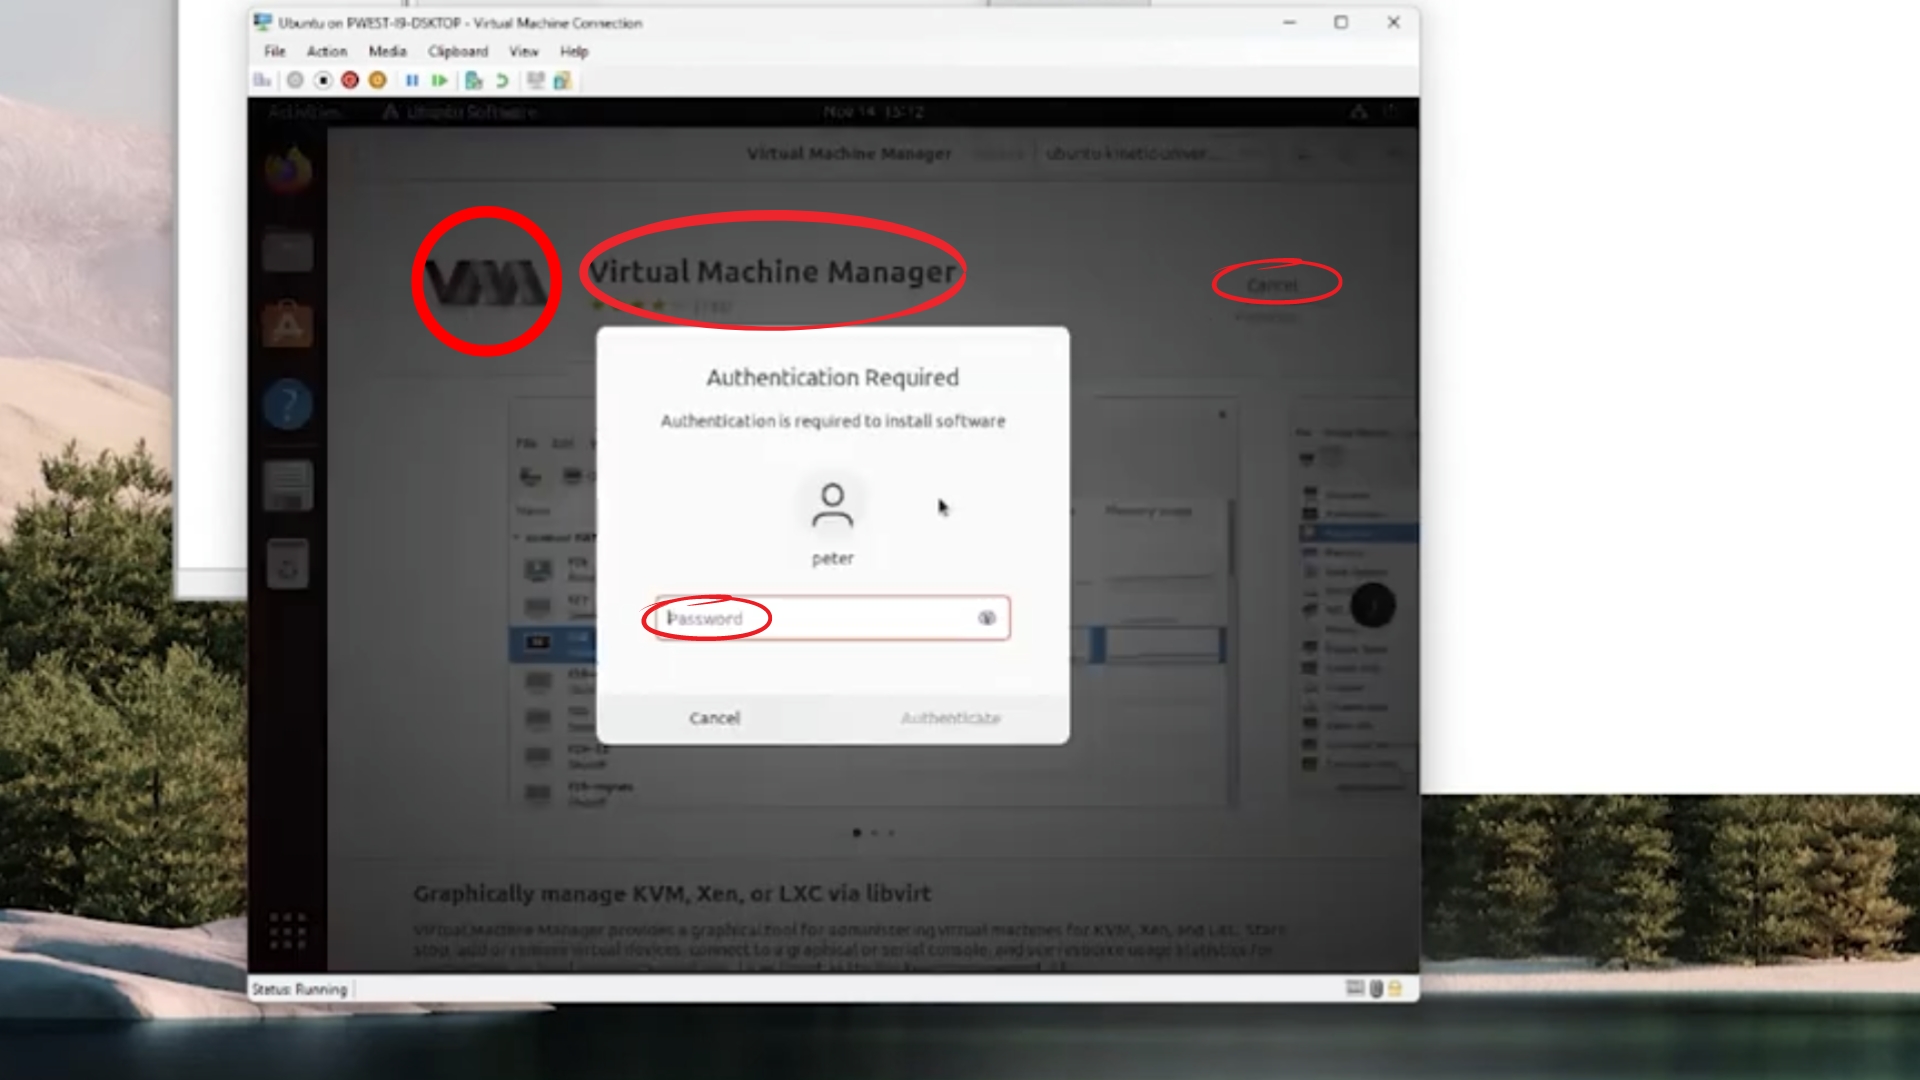
- After UBUNTU is installed, in the UBUNTU client go to search and search for "virtual machine"
- Click on "Virtual Machine Manager". It should have a VM logo
- Press "Install" and type in your password
Add Connection:
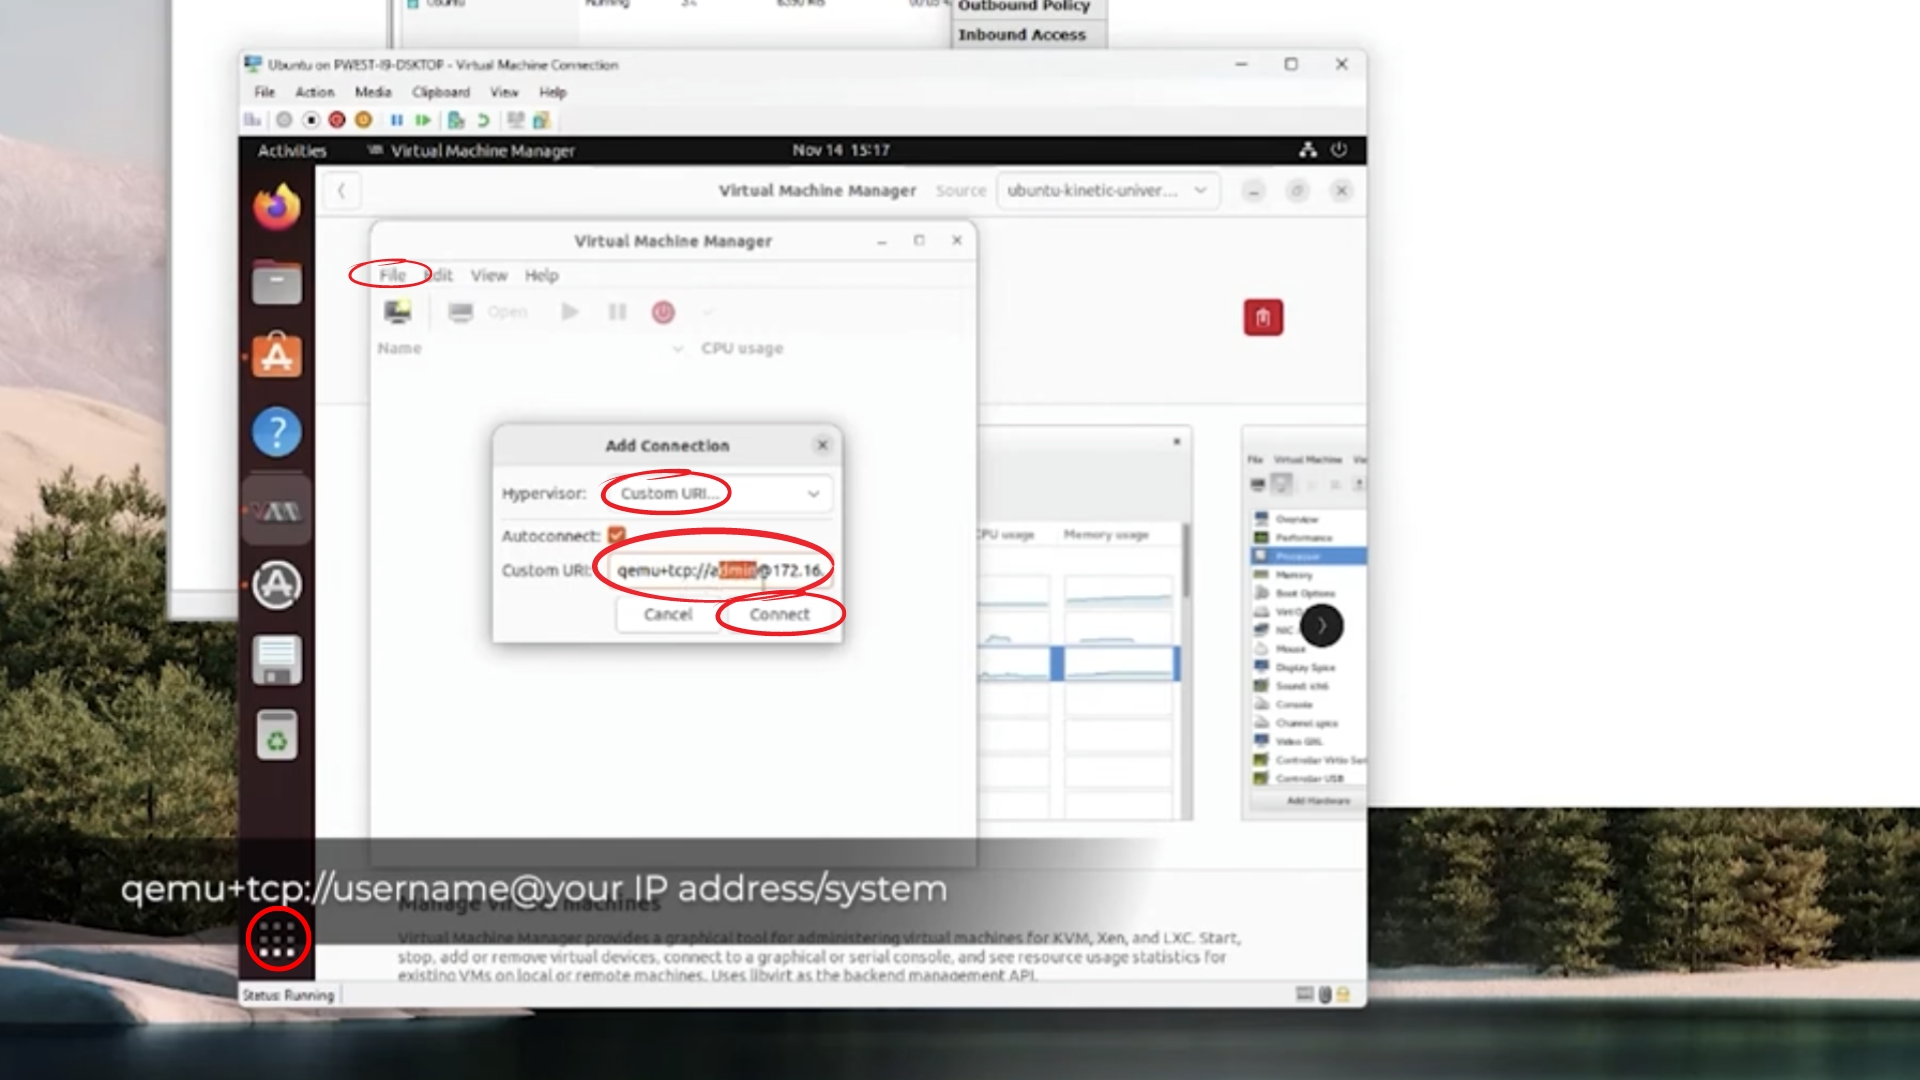
- In UBUNTU, go to apps (bottom left, square with 9 dots)
- Click on Virtual Machine Manager
Note: Once it opens, if you have anything in the box already delete it first
- Inside Virtual Machine Manager, Click on "File"
- Select "Custom URL" in the drop-down box
- type in qemu+tcp://username@your IP address/system. For example, Peter types in qemu+tcp://admin@172.16.253.1/system
- Click "connect"
- Type in your credentials to the router, same as you would if you were logging into the router
ISO Install:
- Go back to your router, and you should still be on the KVM page
- Under "Save" it says "Click HERE to open a file manager"
- Click on "HERE". This will open a pop-up
- In this pop-up, you are going to insert your ISO into the box
- So, open up your Folder app on your desktop
- Go to Download
- Select your Windows Server and drag it to the box in the pop-up
- Wait for it to upload

Create New Virtual Machine:
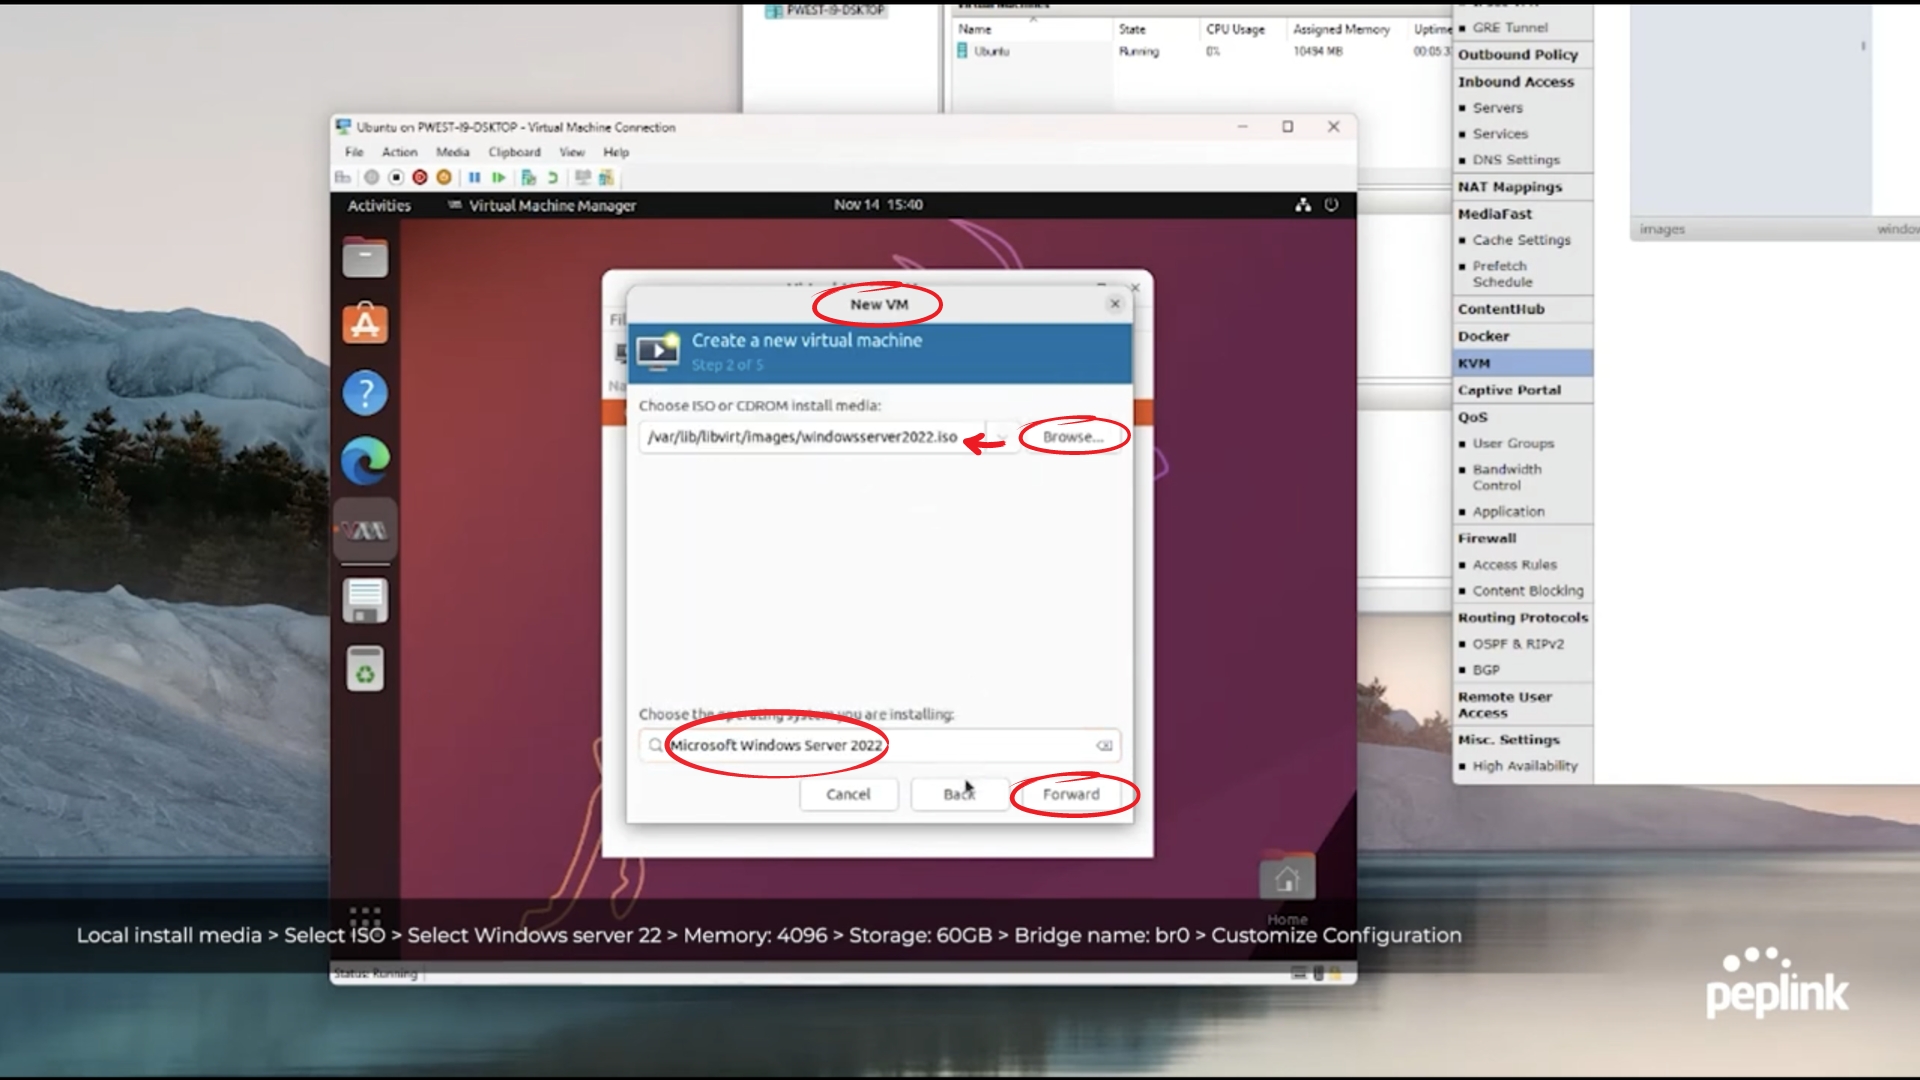
- In UBUNTU, go to Virtual Machine Manager
- Click add new VM
- Click "Browse" and select the ISO you just uploaded
- Click "Choose Volume"
- At the bottom, type in Microsoft Windows Server 2022
- Click "Forward"
- Now, set "Memory:" to 4096 by typing it into the box
- Click "Forward"
- Set it at 60 GB of storage
- Click "Forward"
- Network selection should be set as "Bridge device"
- In "Device name:" name it br0
- Then, click the checkbox next to "Customize configuration before install"
- Click "Finish"

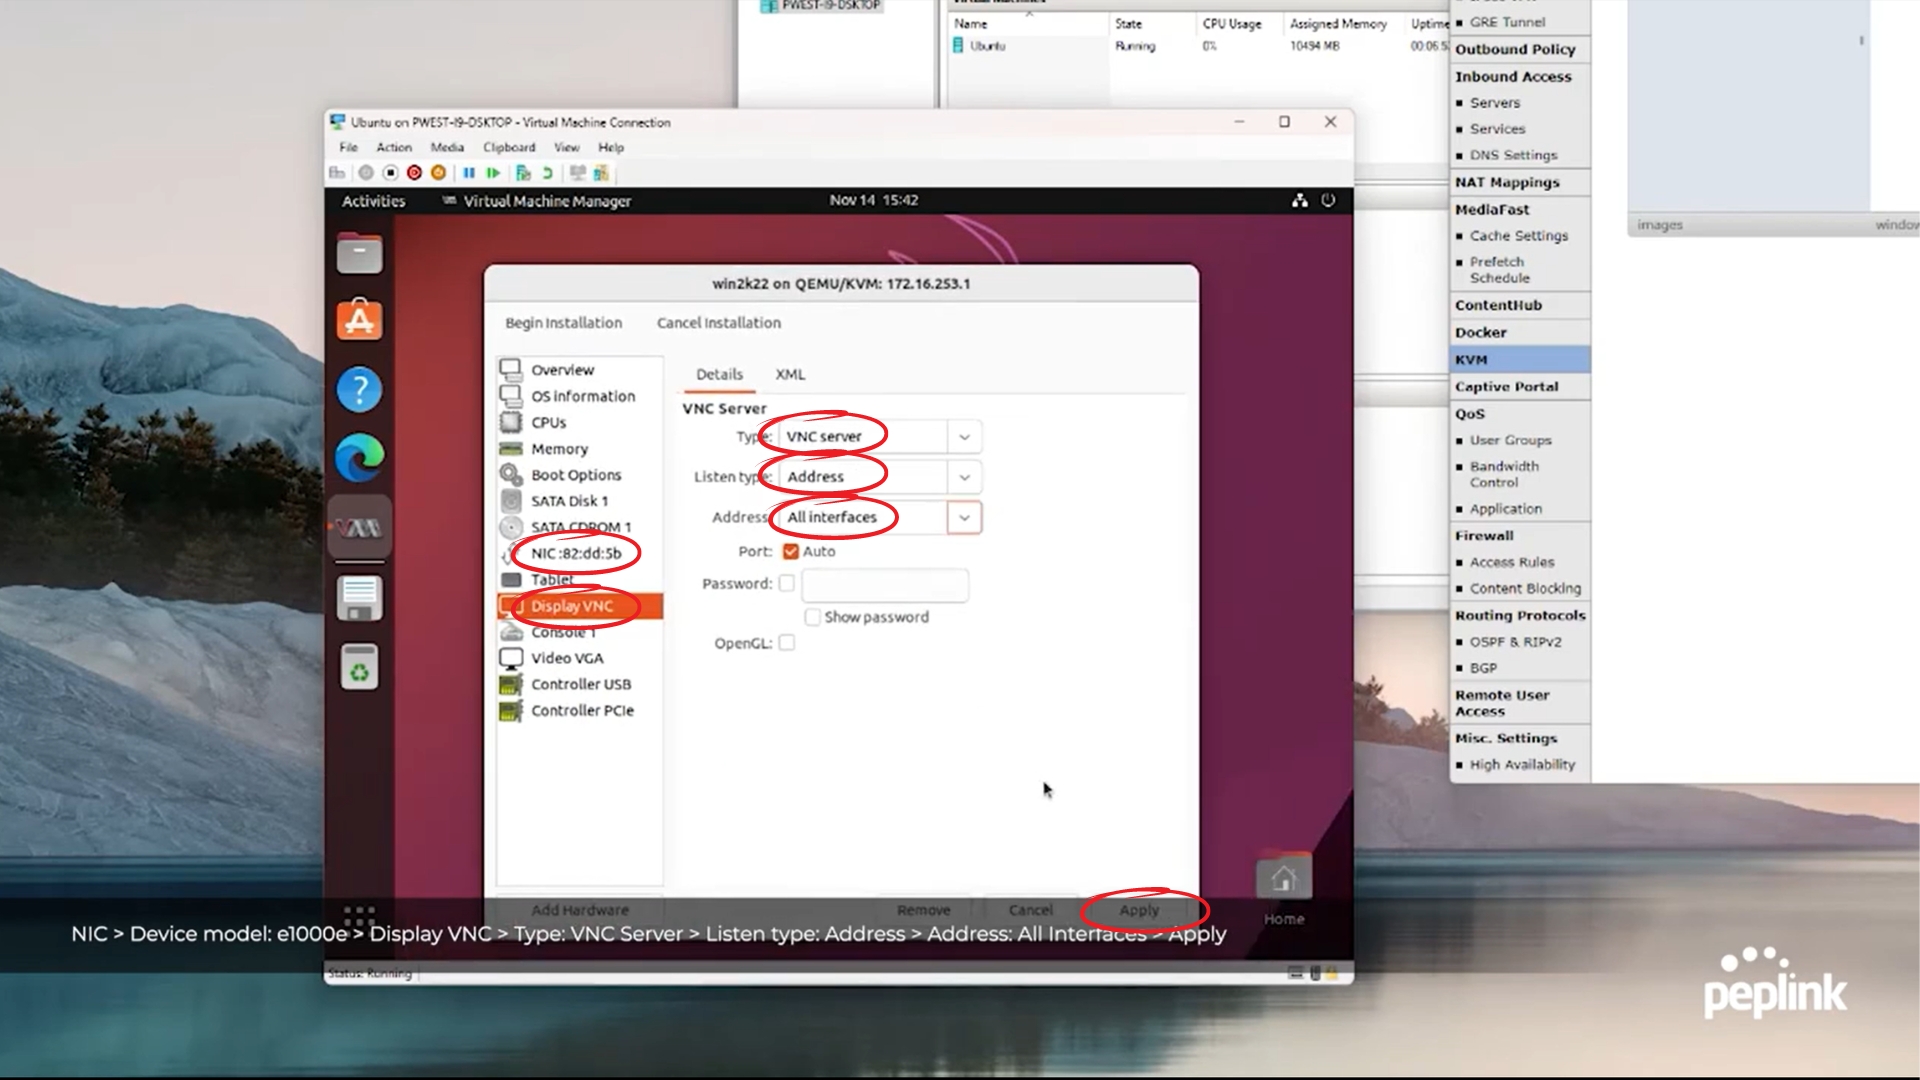
- Now, in the pop-up, you first want to go to "NIC:82:dd:5b" on the left menu and make sure that "Device model" is e1000e
- Then, go to "Display VNC" on the left menu
- Under VNC Server, set "Type:" to VNC server by using the drop-down box
- Set the "Listen type:" to Address by using the drop-down box
- Set "Address:" to All interfaces by using the drop-down box
- Apply
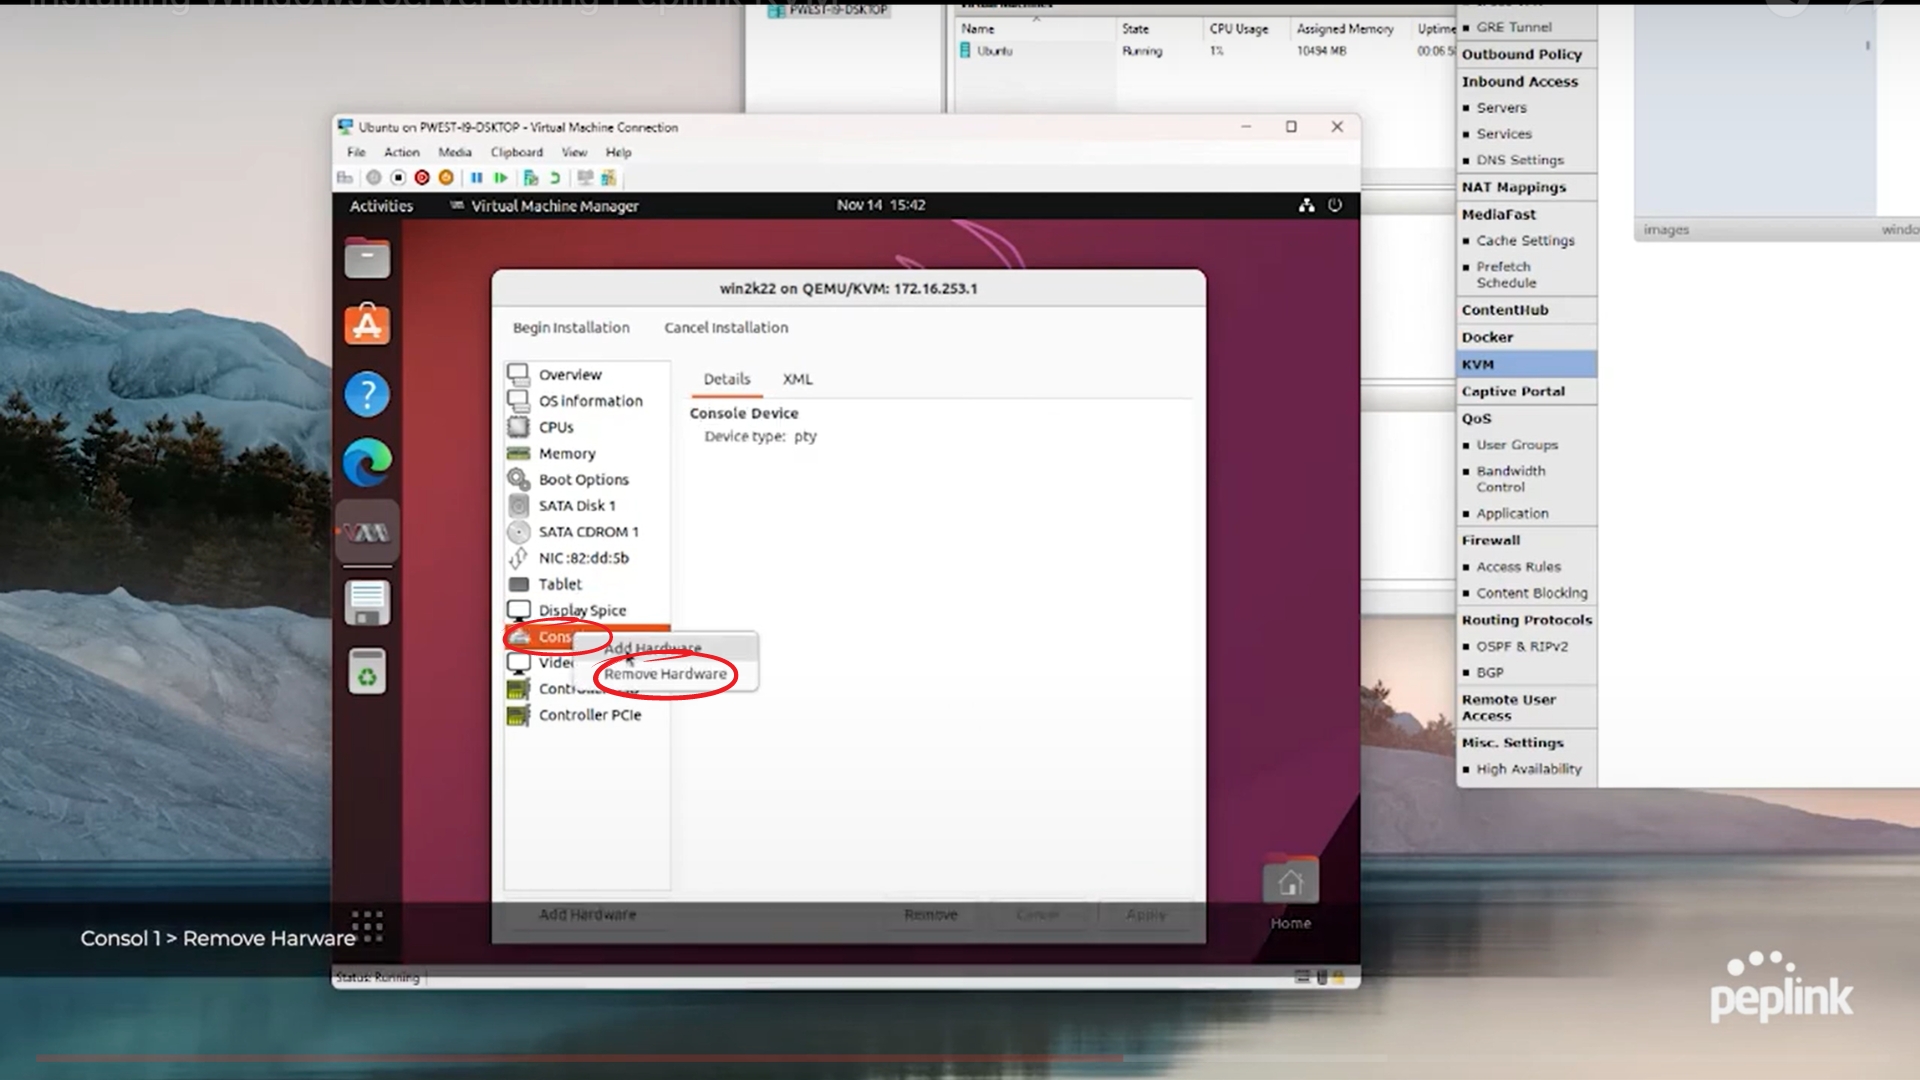
- Now, Right-click your mouse on "Console 1" and select "Remove Hardware". This will open a pop-up, click "Yes"
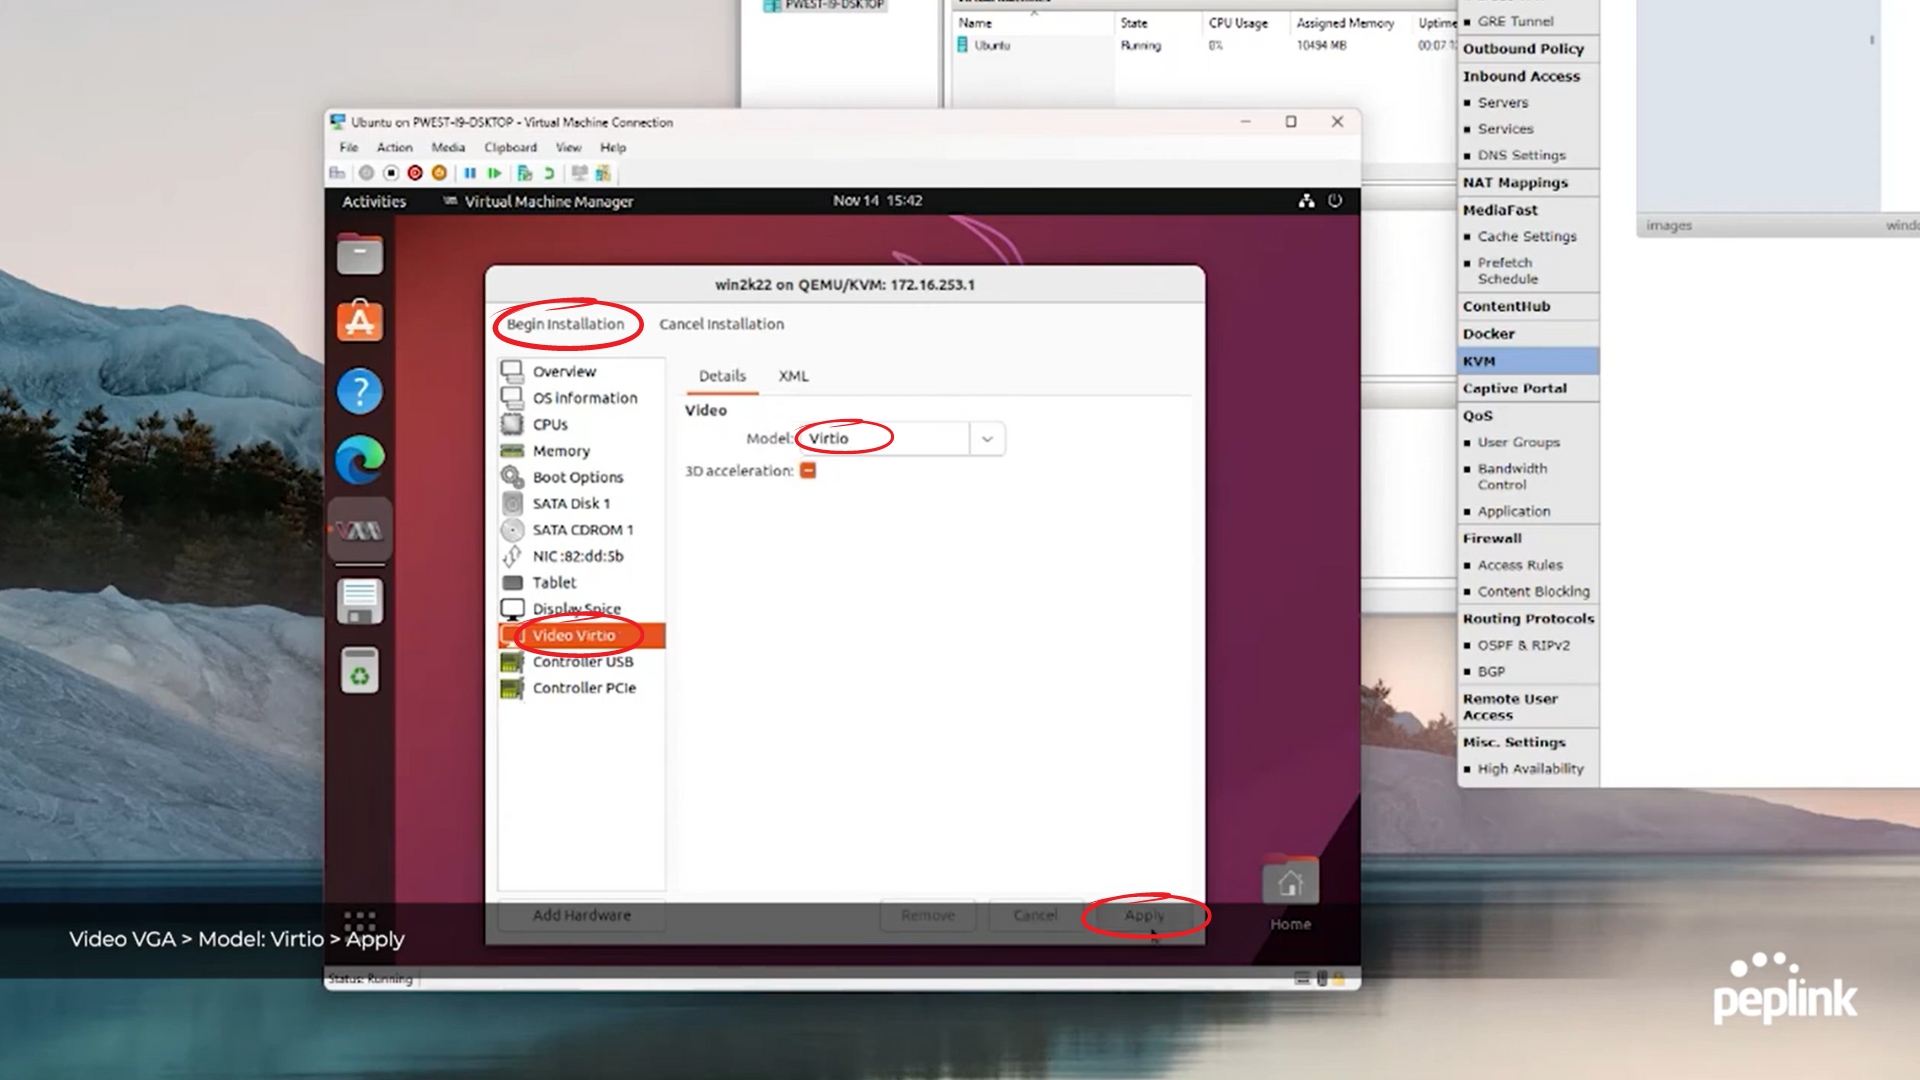
- In the left menu, go to "Video Virtio"
- In "Model:", select Virtio by using the drop-down box
- Click "Apply"
- At the top left, click "Begin Installation". This will open a pop-up
- In the pop-up, click "Next" at the bottom right
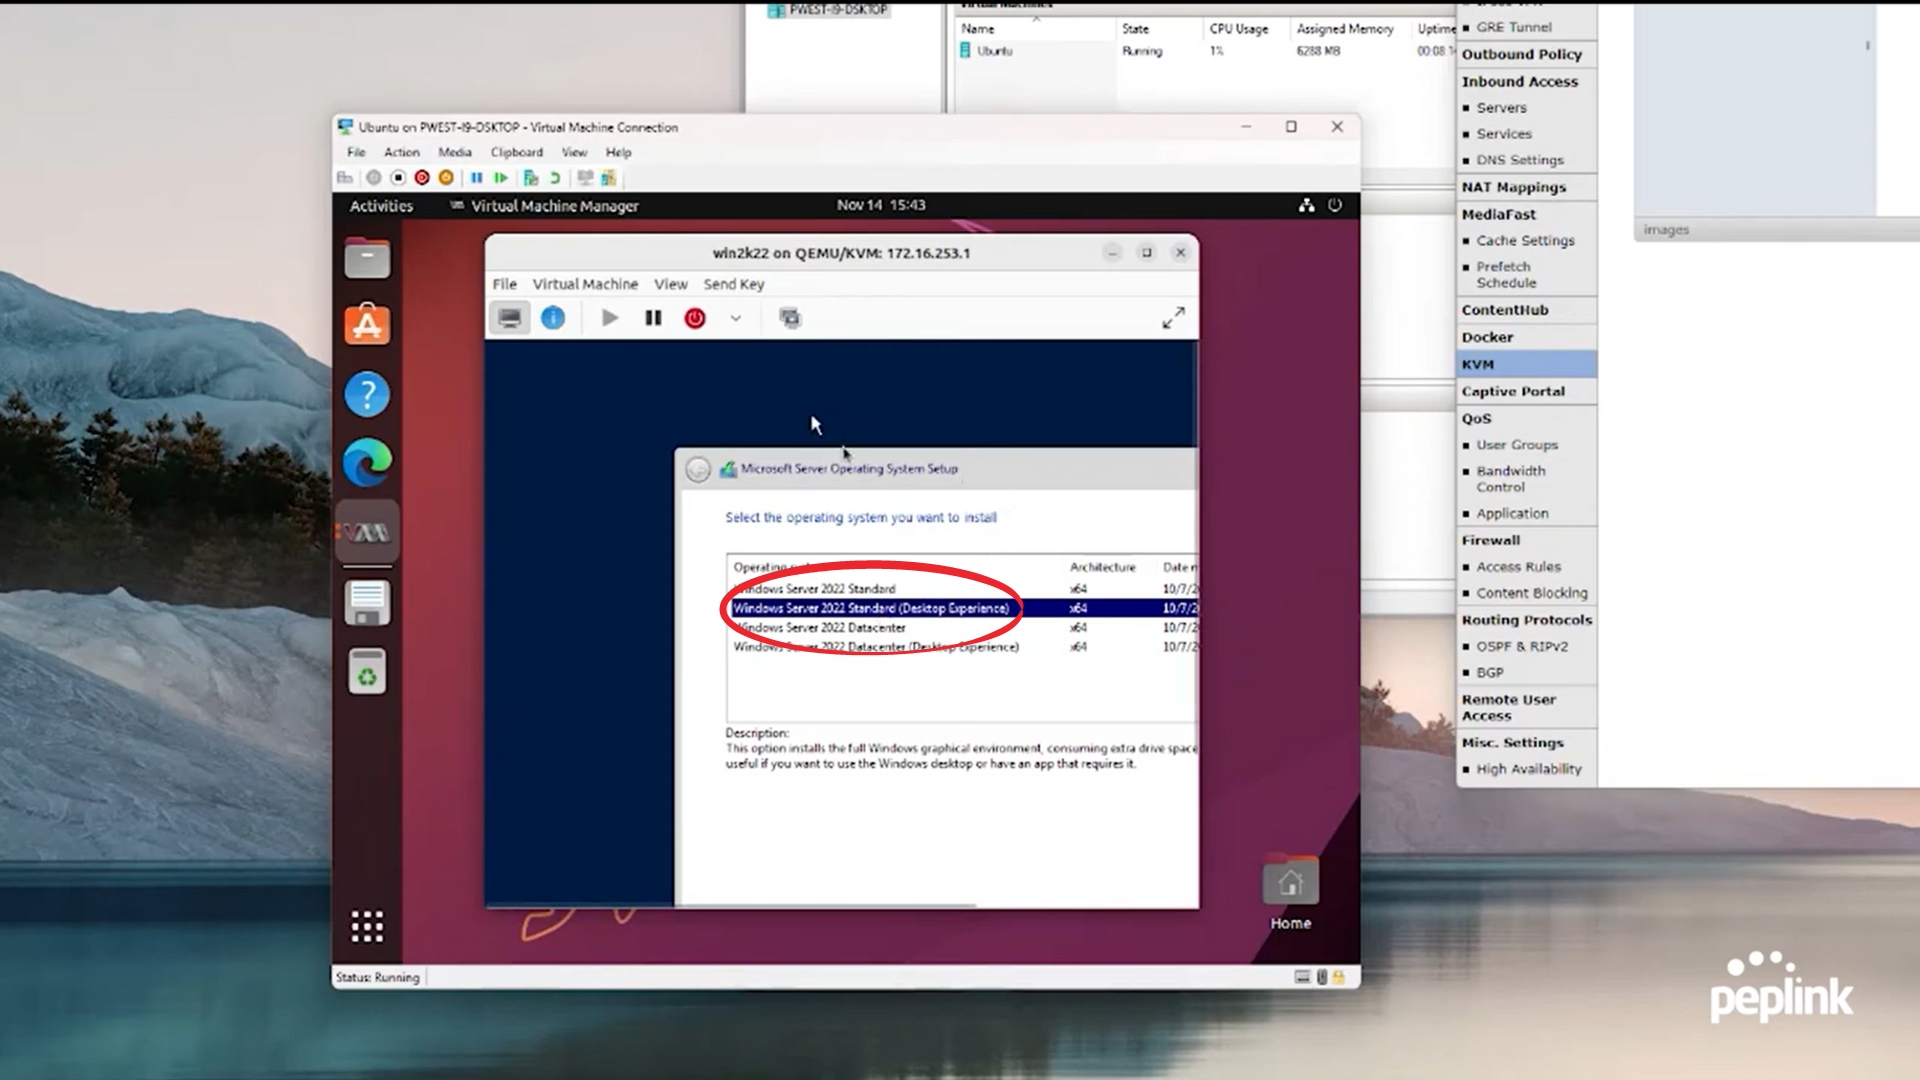
- Then, in the middle, click "Install"
- Peter then chooses "Windows Server 2022 Standard(Desktop Experience)". Normally you would use a server core
- Click "Next"
- Then, at the bottom click the checkbox to agree to the License Terms
- Click "Next"
- Click "Custom Install"
- Click "Next"
Enable Remote Desktop Services:
- Now, the Windows machine will be loaded up to a "Customize Settings" page
- Type your password into the "Password" and "Reenter Password" boxes
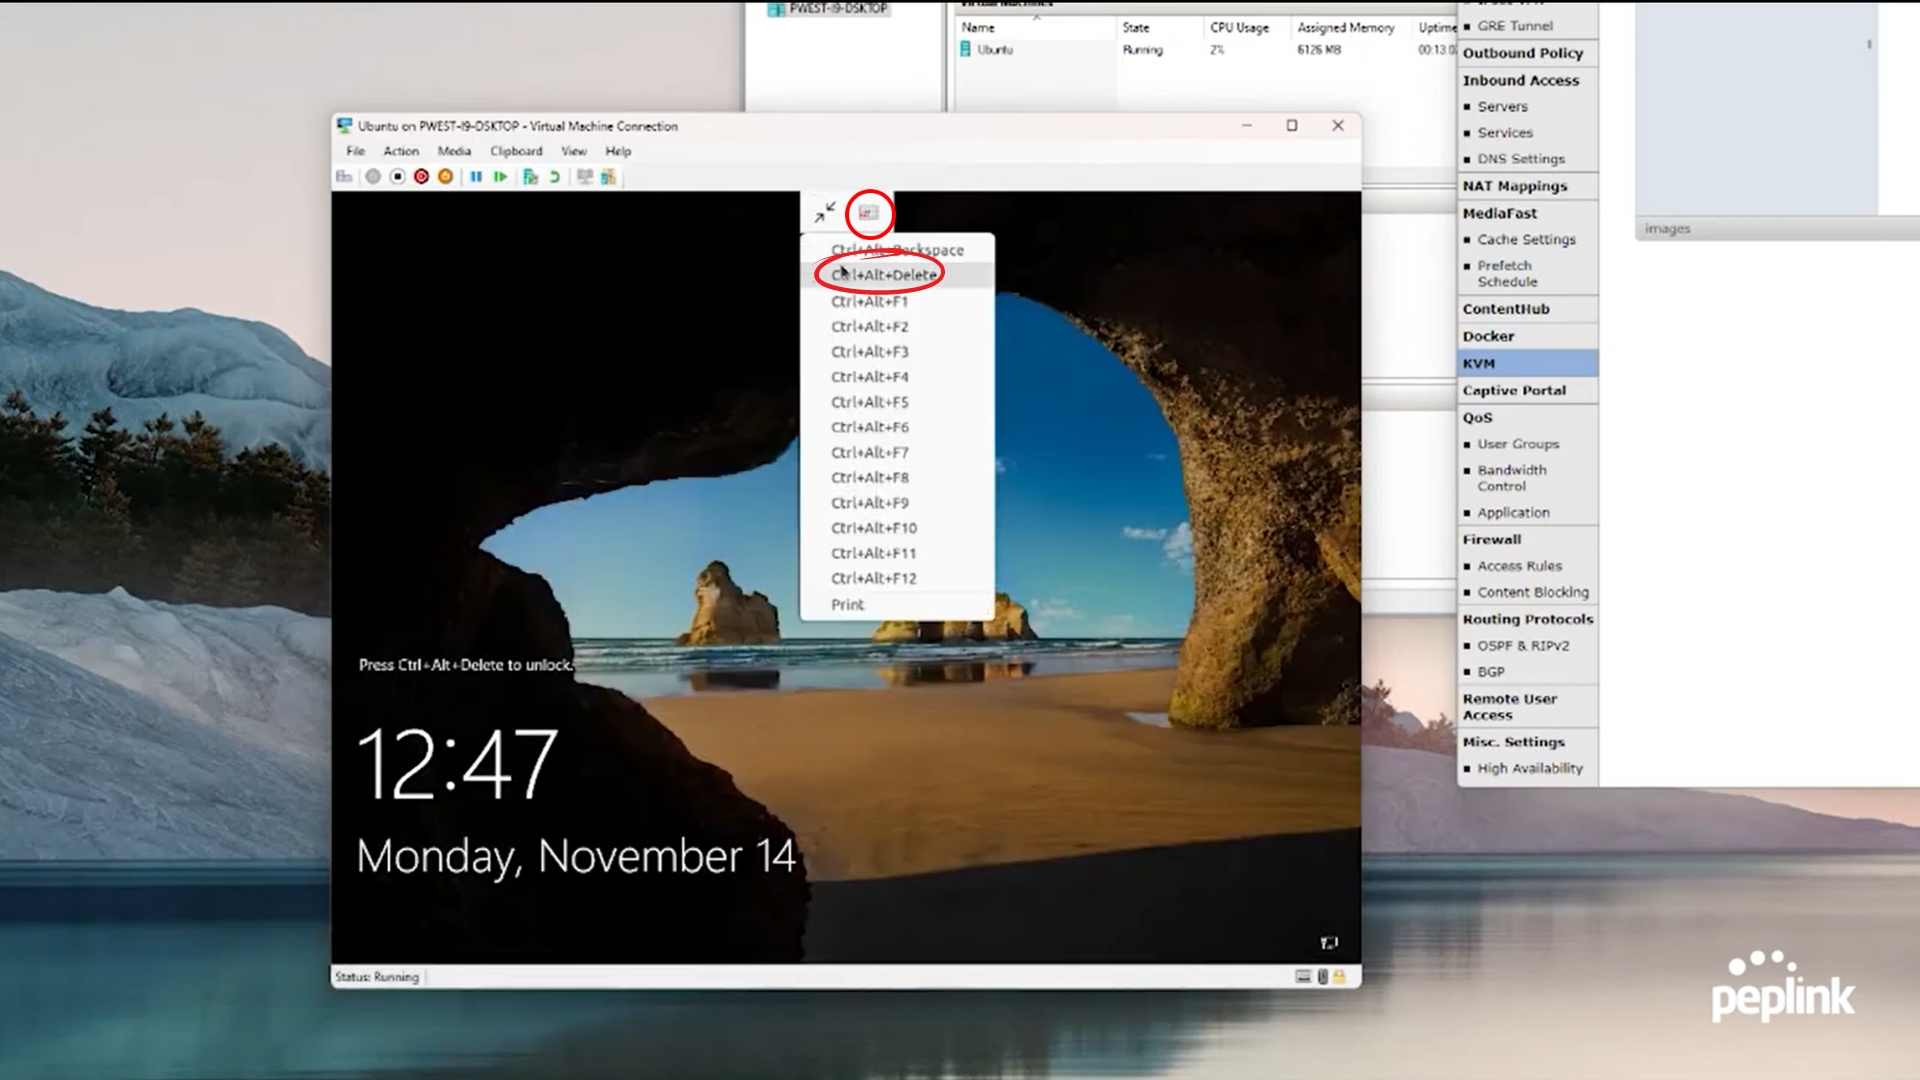
- Windows will now load
- Enlarge the screen, then go to the top middle and click on the white logo. Click on "Ctrl+Alt+Delete". This will take you to the sign-in page
- Enter your password. This enables Remote Desktop
InTouch with InControl2:
- Go to InControl
- Go to your group and click on your device. Peter selects the "PTS-EPX"
- Then, in the top menu go to Clients
- Now, you should see your windows server. To the right, click "InTouch"

- In "URL on LAN", select "rdp" in the drop-down box
- Then, type in administrator in the next box to the right
- Click "OK"
- Click "Save Changes"

Using Remote Desktop:
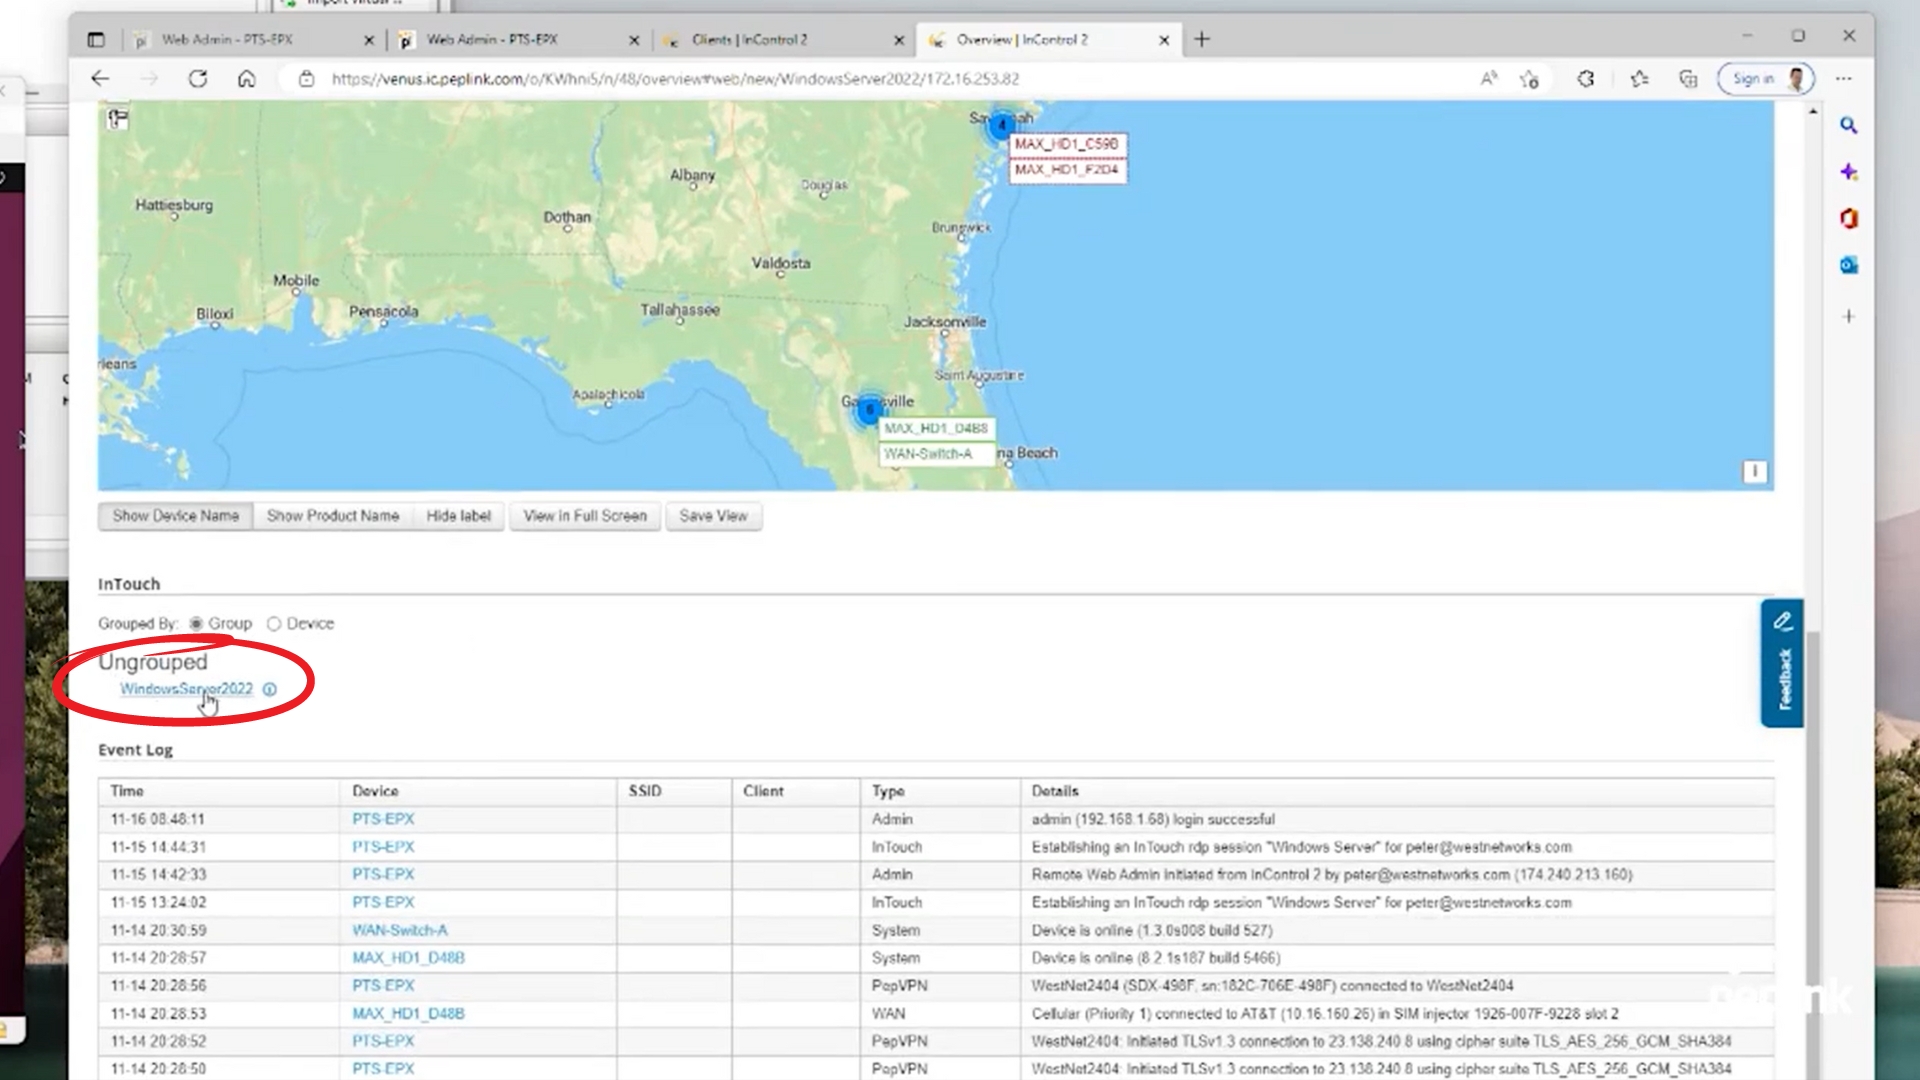
- Go back to your group
- Scroll down
- Under "Ungrouped" your Windows Server will be there. Click on it
- Log in with your password
Related posts


June 20, 2025
