
Peplink AP Pro AC Setup
March 9, 2021
Tutorial - Setting up a Balance20X!
In this video, Peter West shows you how to set up a Balance 20X!
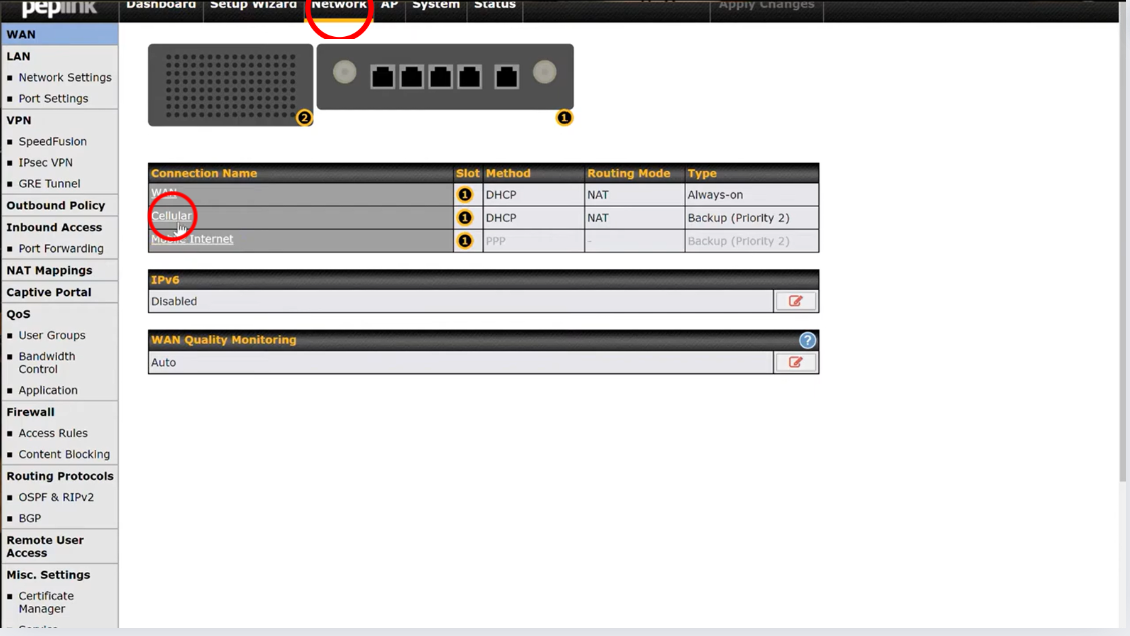
Enabling cellular:
- Click "Network" in the menu
- In the 'Connection Name' area, click on Cellular
- Go to Operator Settings and set it to Custom
- Peter sets the APN name to "atlanwifi"
- Enable Data Roaming by clicking the checkbox, set to 'Any Countries'
- Select 'Save' at the bottom right. Select Apply Changes in the menu.

Setting up LAN:
- Click "Network" in the menu
- Select Untagged LAN Network Settings
- He changes the IP Adress to 10.1.10.1
- Changes DHCP IP Range to "10.1.10.2 - 10.1.10.253"
- Save and Apply
Adding device to InControl2:
- In InControl, go to settings and click 'Add Devices'
- Enter serial number

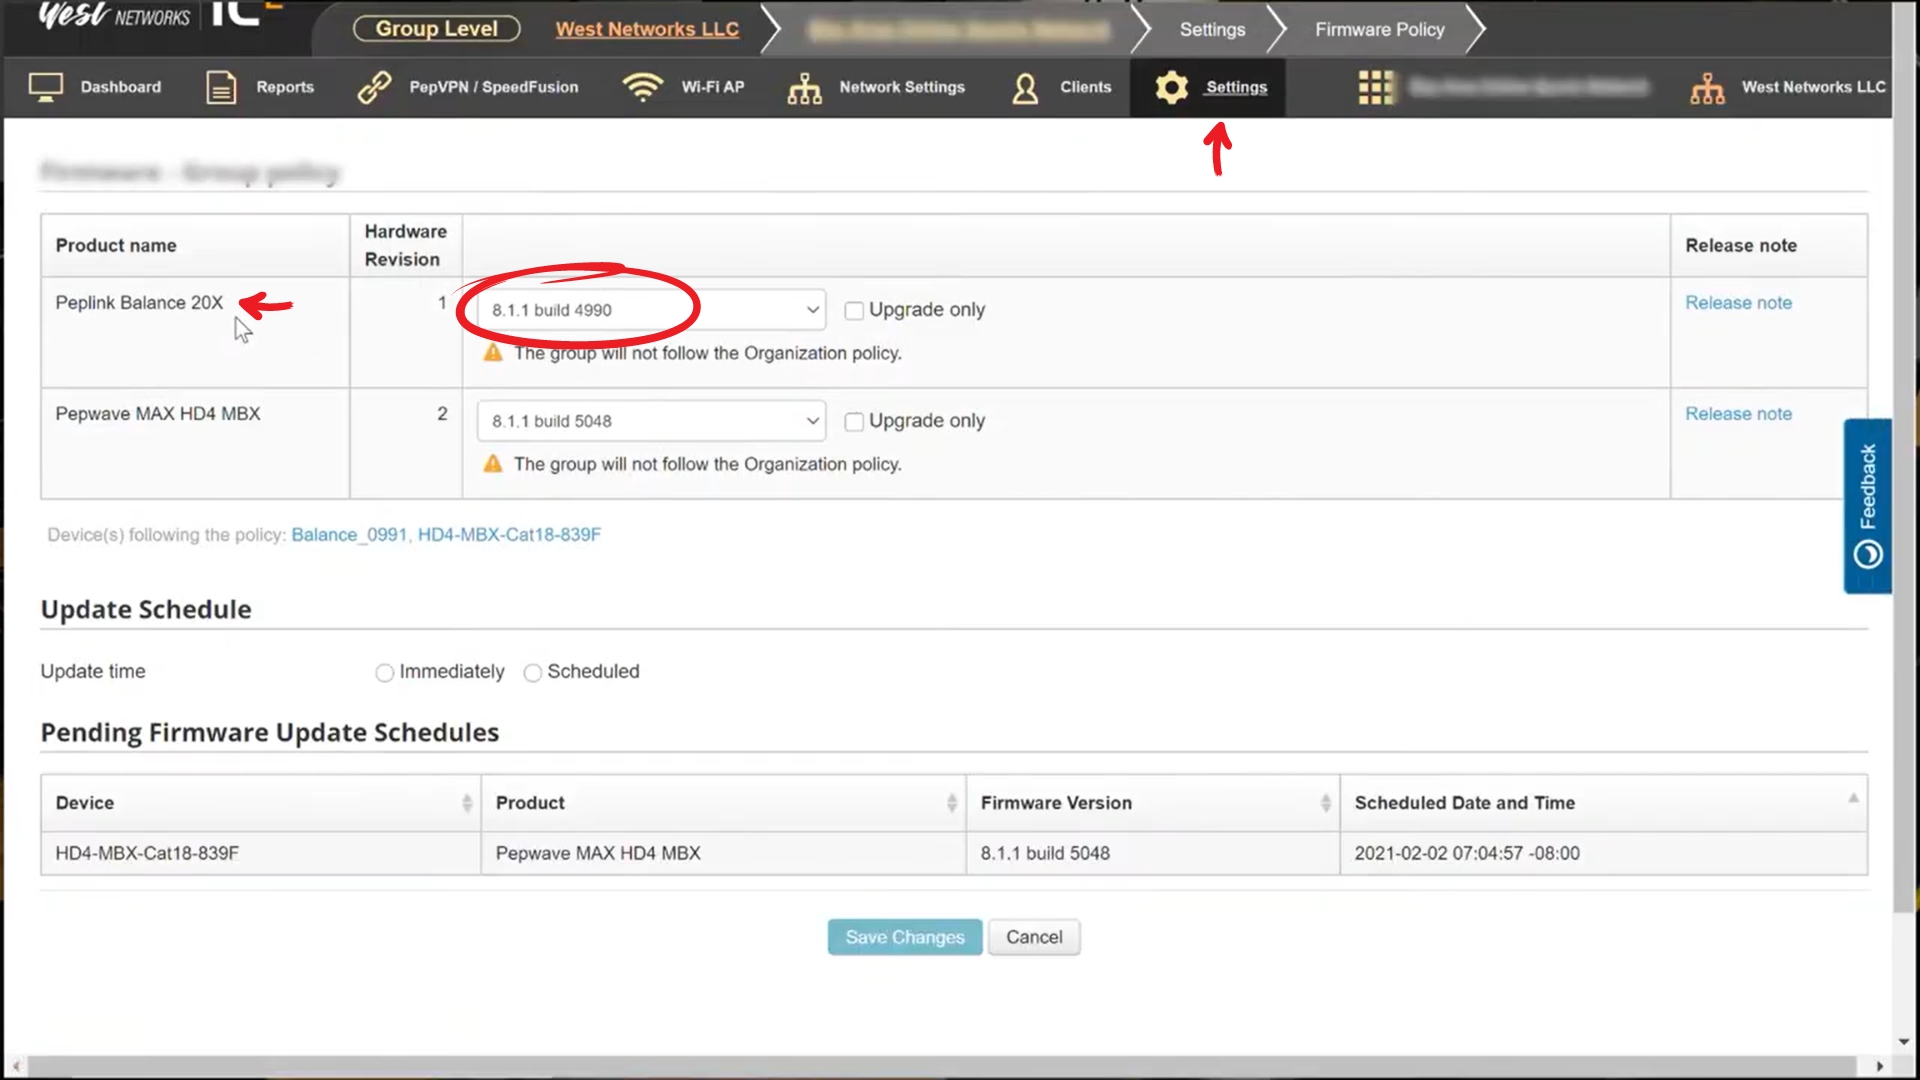
To support SpeedFusion Cloud:
- In the menu, go to Settings and click Firmware Policy. Make sure the correct firmware is being used, so in Peter's case 8.1.1
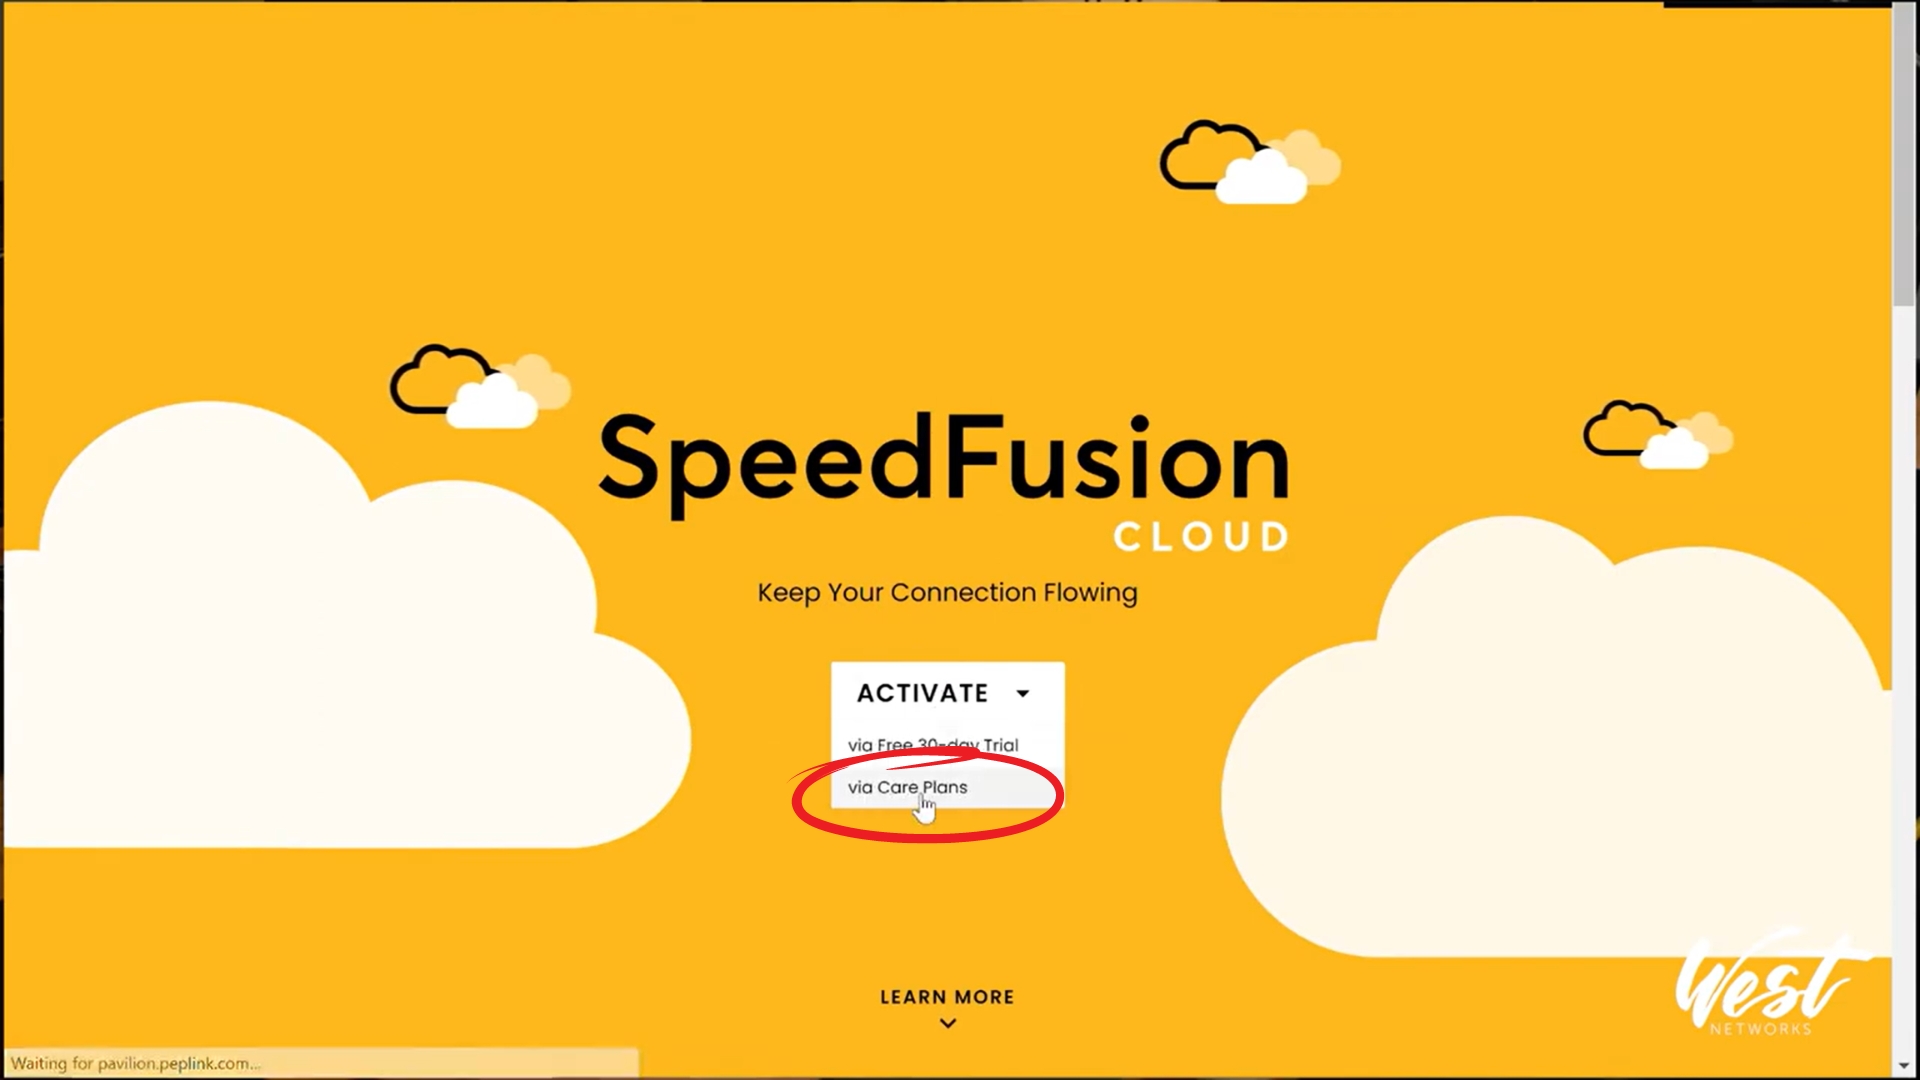
How to use the device with SF Cloud:
- Go back to the router
- Select SpeedFusion Cloud in the menu, and click "Get Your Activation Key Now"
- Select 'ACTIVATE via Care Plans'
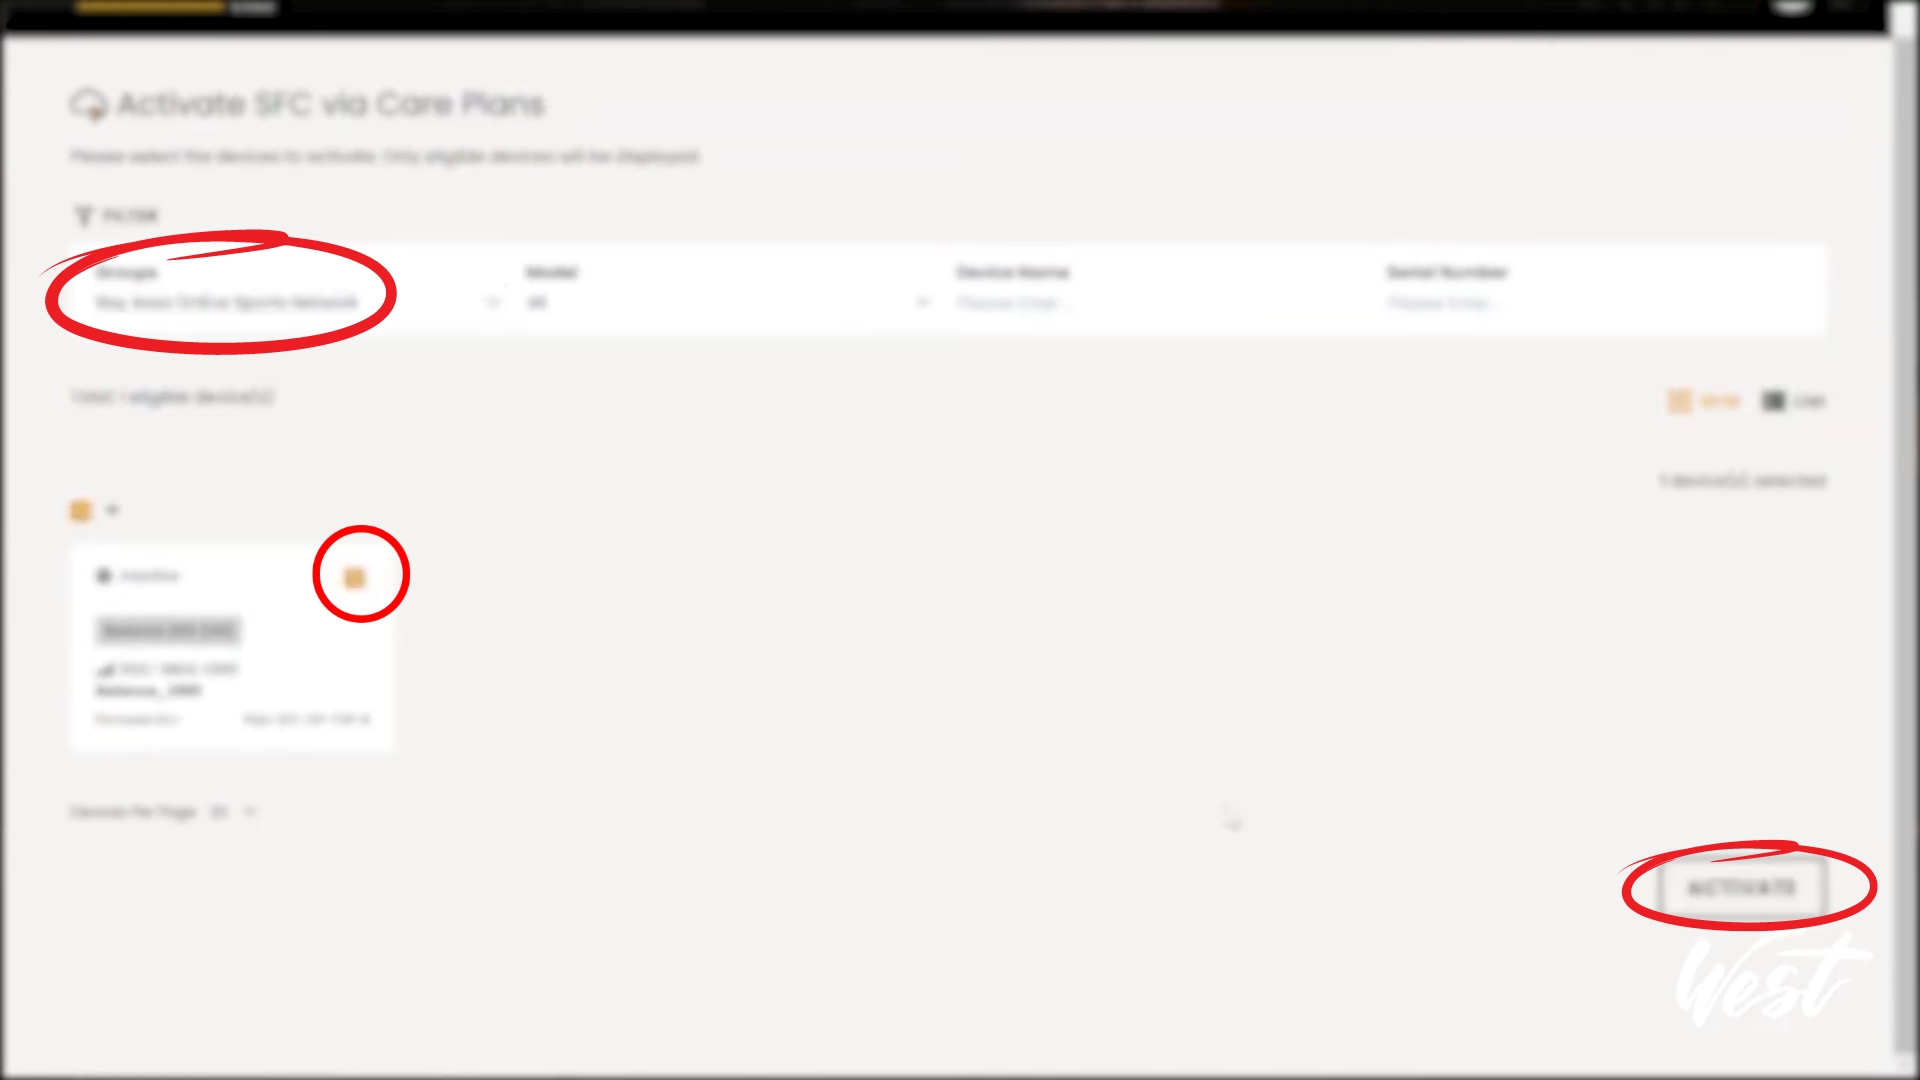
- This will bring you to all your routers, so then select the group for this device
- Select checkbox, then click Activate
- Now the device is activated to SpeedFusion Cloud
Choosing Cloud Location:
- go back to router
- on the menu, go back to SpeedFusion Cloud
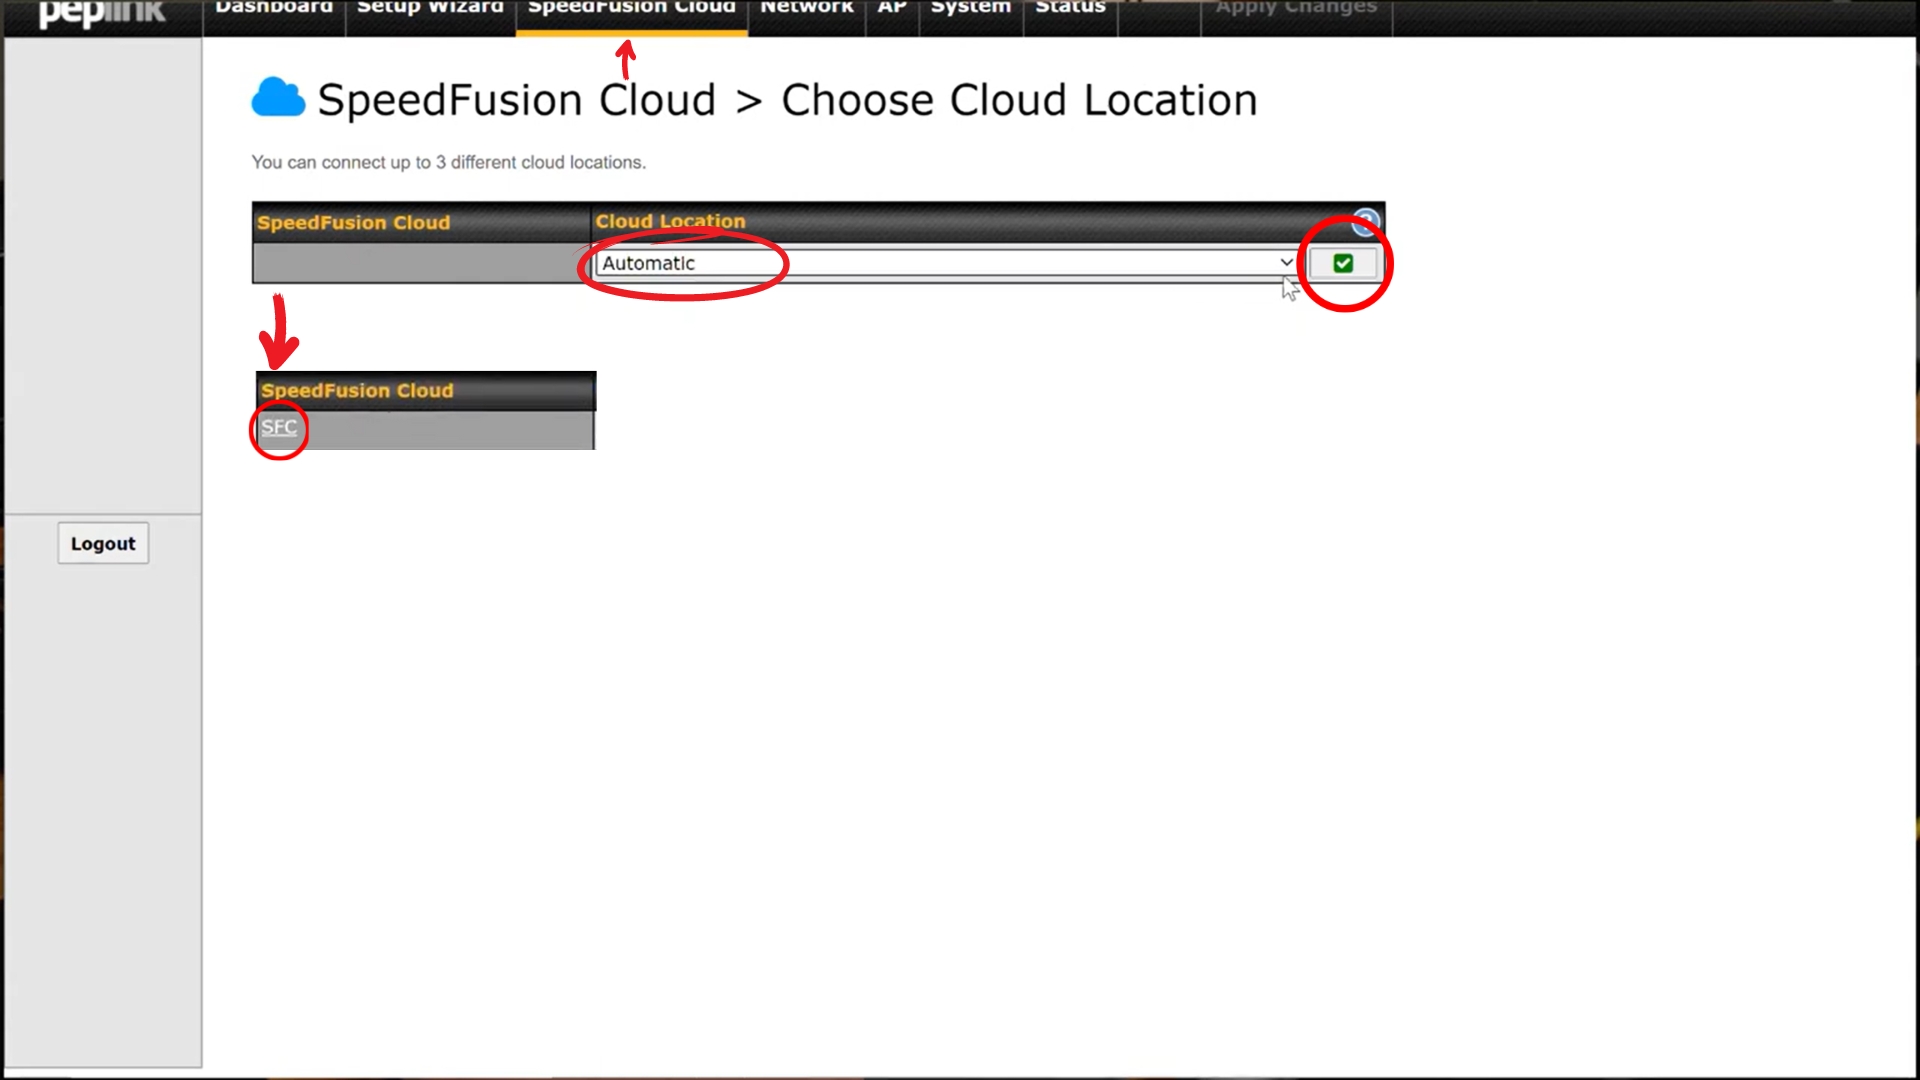
- Select 'Choose Cloud Location'. He selects Automatic for Cloud Location. hit save.
- Once you hit save, under SpeedFusion Cloud net to Cloud Location, and SFC button will appear. Click SFC.
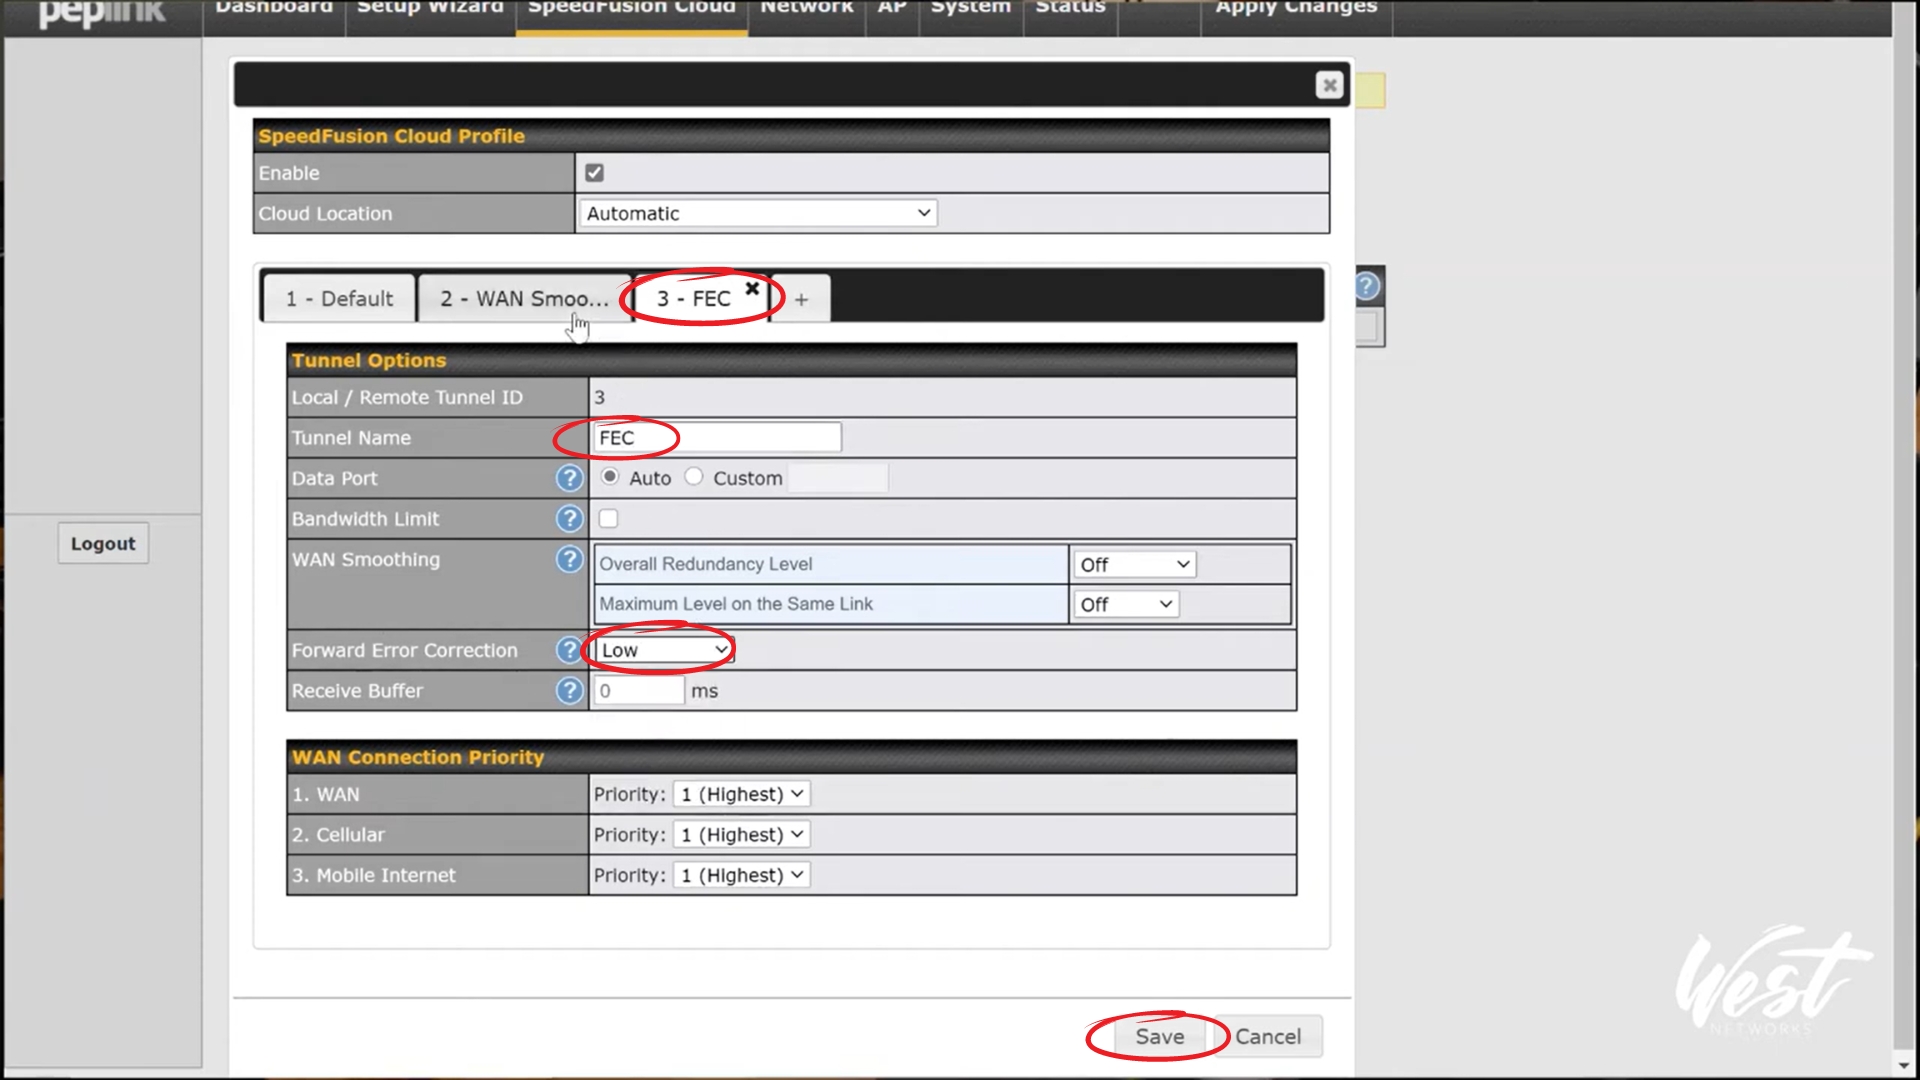
- On this page, you can change your settings.
- At the top of Tunnel Option, hit the '+' button and it will add a profile. Then, go to Tunnel Name and choose your desired name. For example, Peter creates two profiles: WAN Smoothing and FEC
- For the WAN Smoothing profile, go to WAN Smoothing option in the Tunnel Options, and he selects 'Normal' for Overall Redundancy Level

- For the FEC profile, go to Forward Error Correction option in Tunnel Options, and he selects 'Low'
- Save and Apply Changes
Optimize Cloud Application
- Go back to SpeedFusion Cloud in the Menu, and Select 'Optimize Cloud Application'
- For SFC WAN Smoothing, peter adds 'Google Workspace', 'Lifesize', 'Microsoft 365', and 'Zoom' under Cloud Application
- Save and apply

Outbound Policy
- In the menu, go to 'Network'
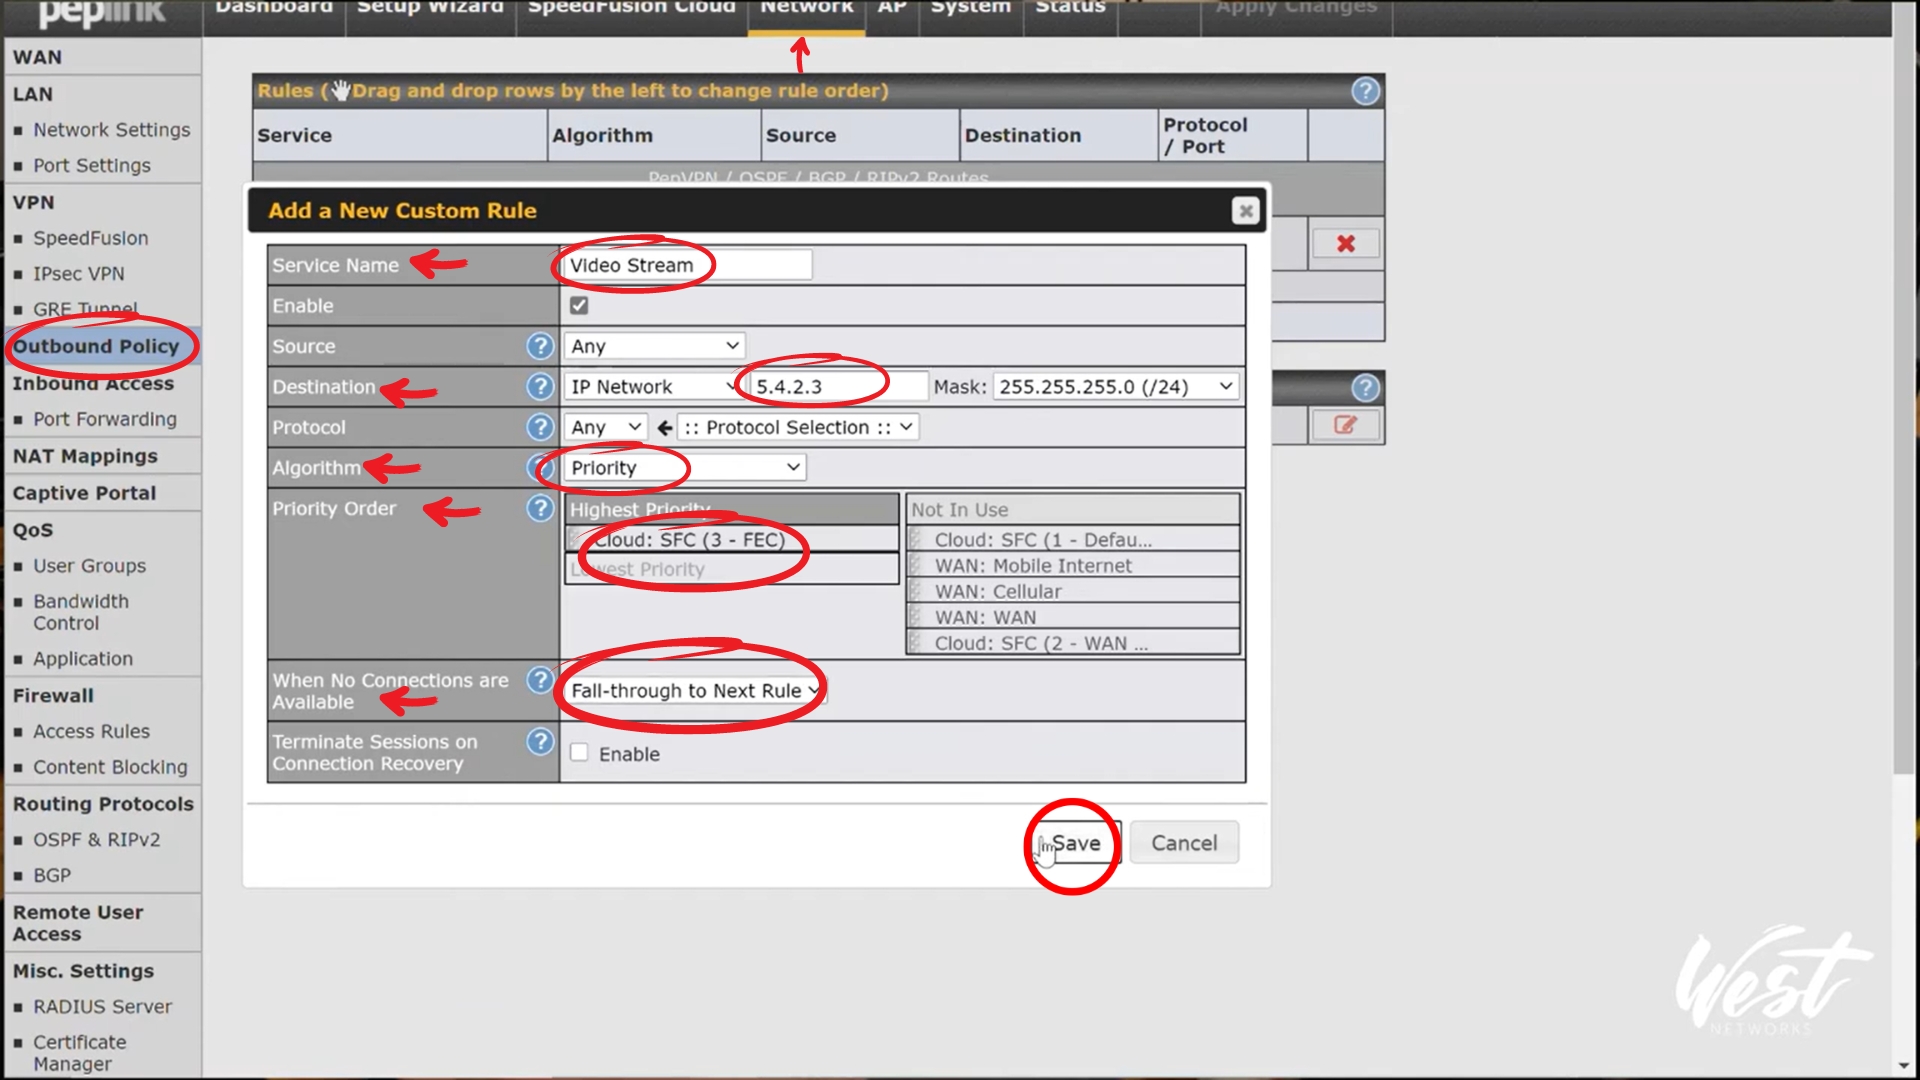
- Go to Outbound Policy in left menu, select Add Rule
- Peter sets Service name to 'Video Stream', then sets the destination IP to 5.4.2.3
- He then changes the Algorithm to 'Priority'
- sets the Highest Priority to only "Cloud: SFC (3 - FEC)"
- Then he changes the setting ' When No Connections are Available' to Fall-through to Next Rule.
- Save and apply
Enabling SpeedFusion between MBX and 20X
(Note: If you plugged in WAN, that would bond with your Cellular which would be how you achieve SpeedFusion Cloud.)
- For his particular set up, he instead wants to do SpeedFusion between an MBX and the Balance 20x.
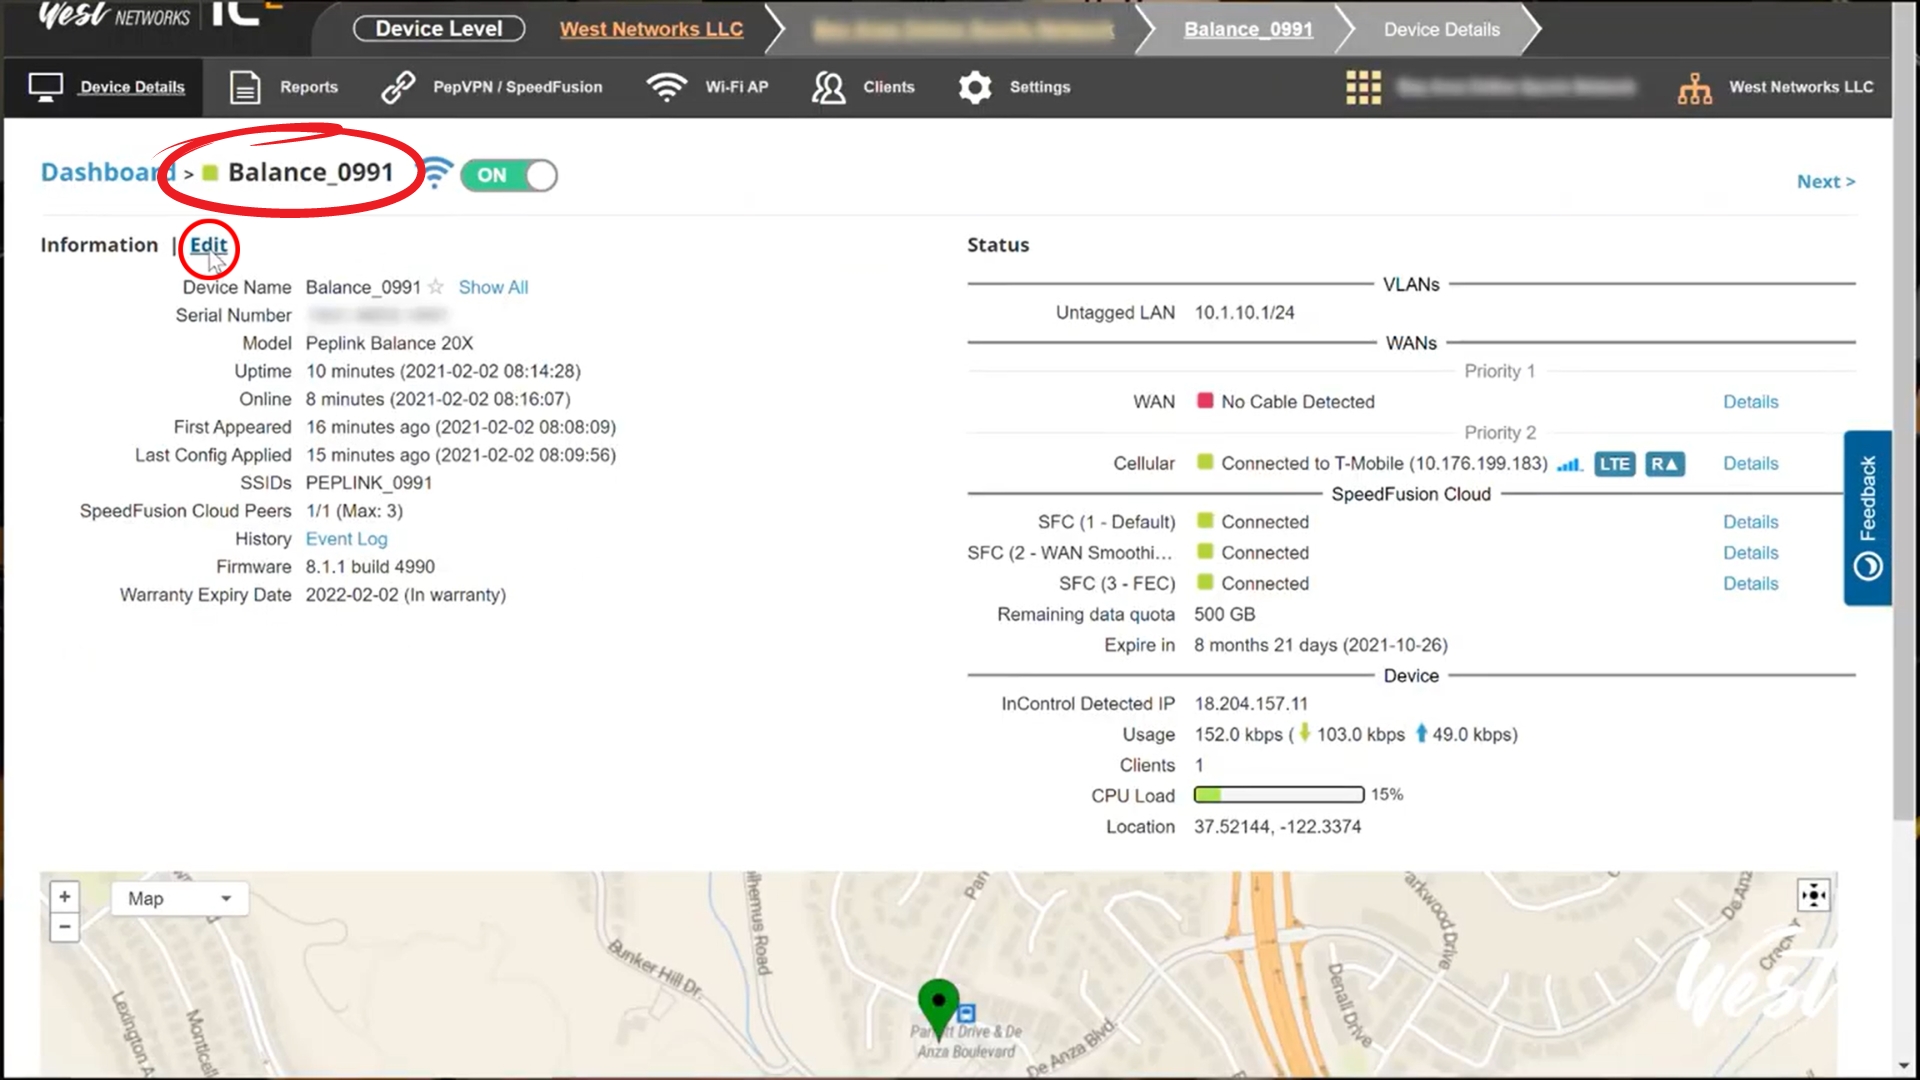
- First, go back to IC2 and click on the Balance 20X. Now, click edit
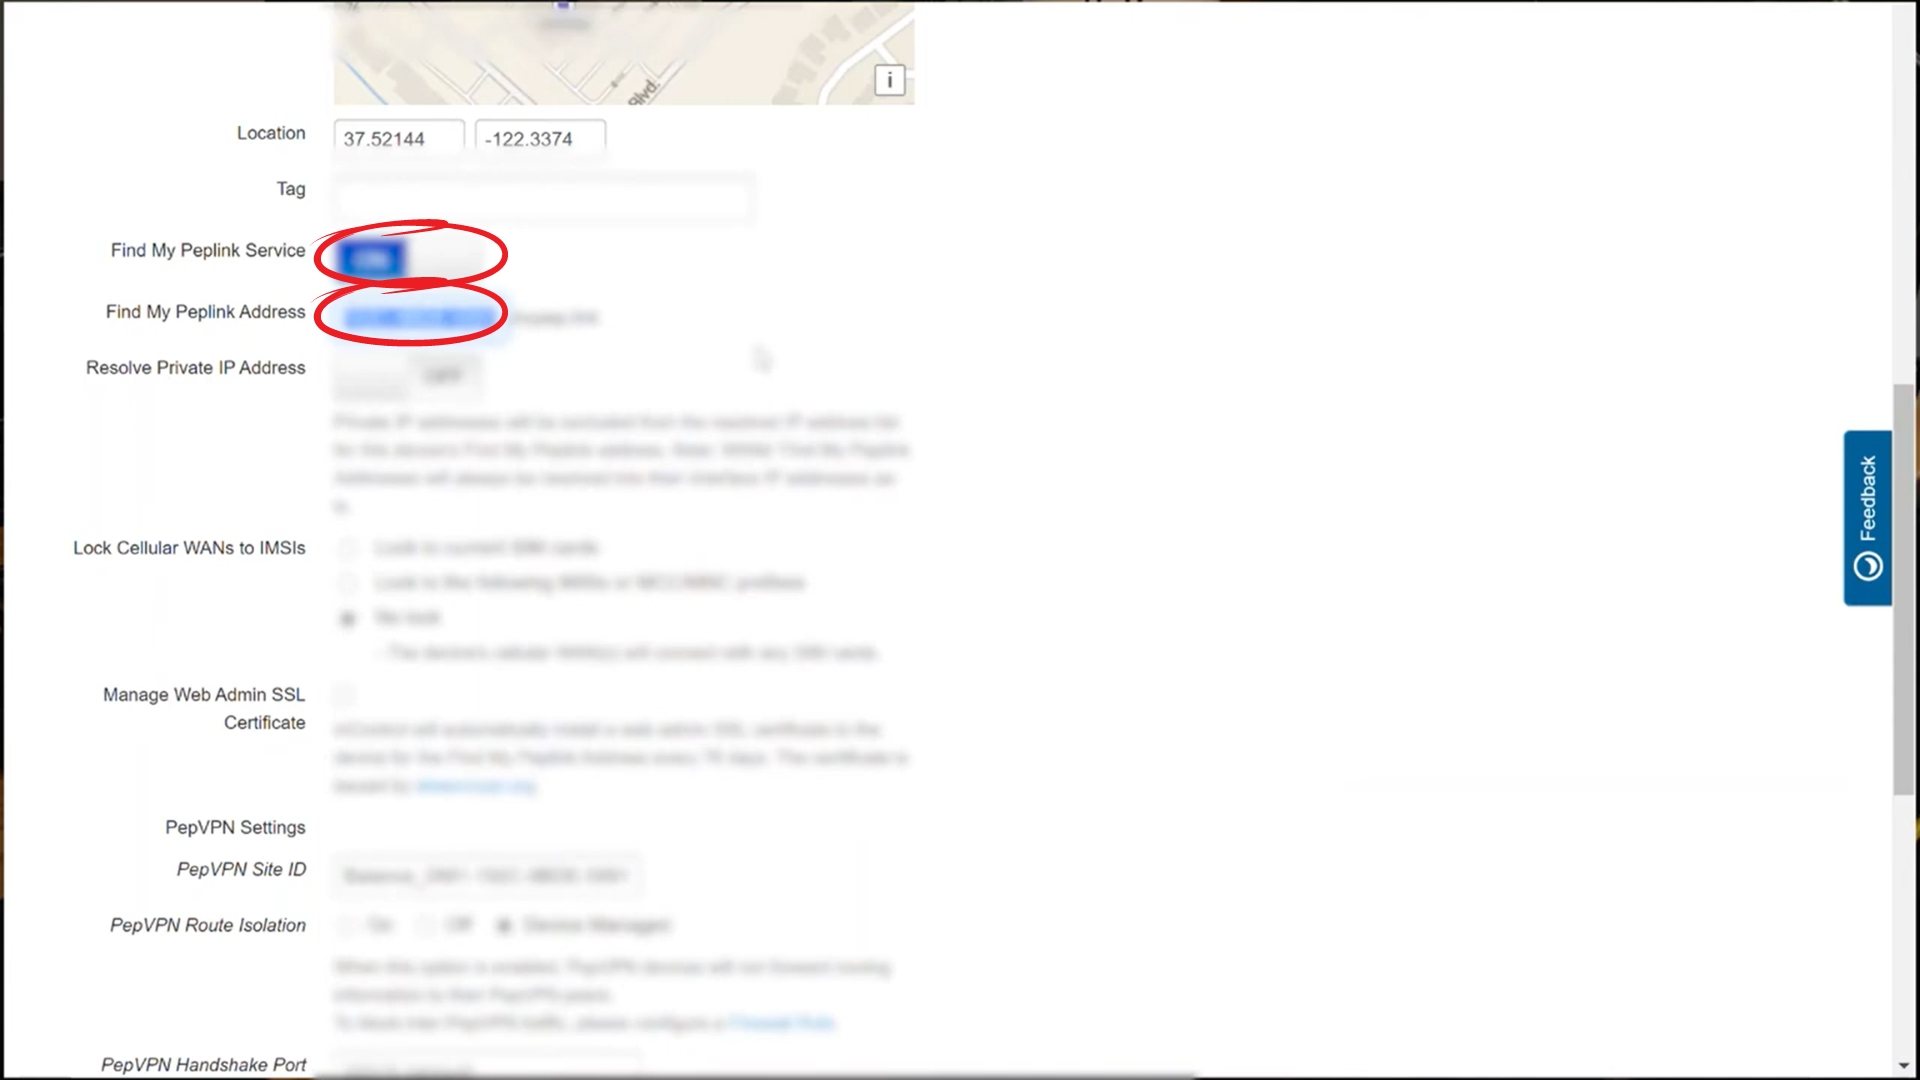
- Now scroll down to 'Find My Peplink Service' and hit ON.
Under that, 'Find My Peplink Address', he changes it to 20xdemo.
(20xdemo.mypep.link) - Scroll down and save
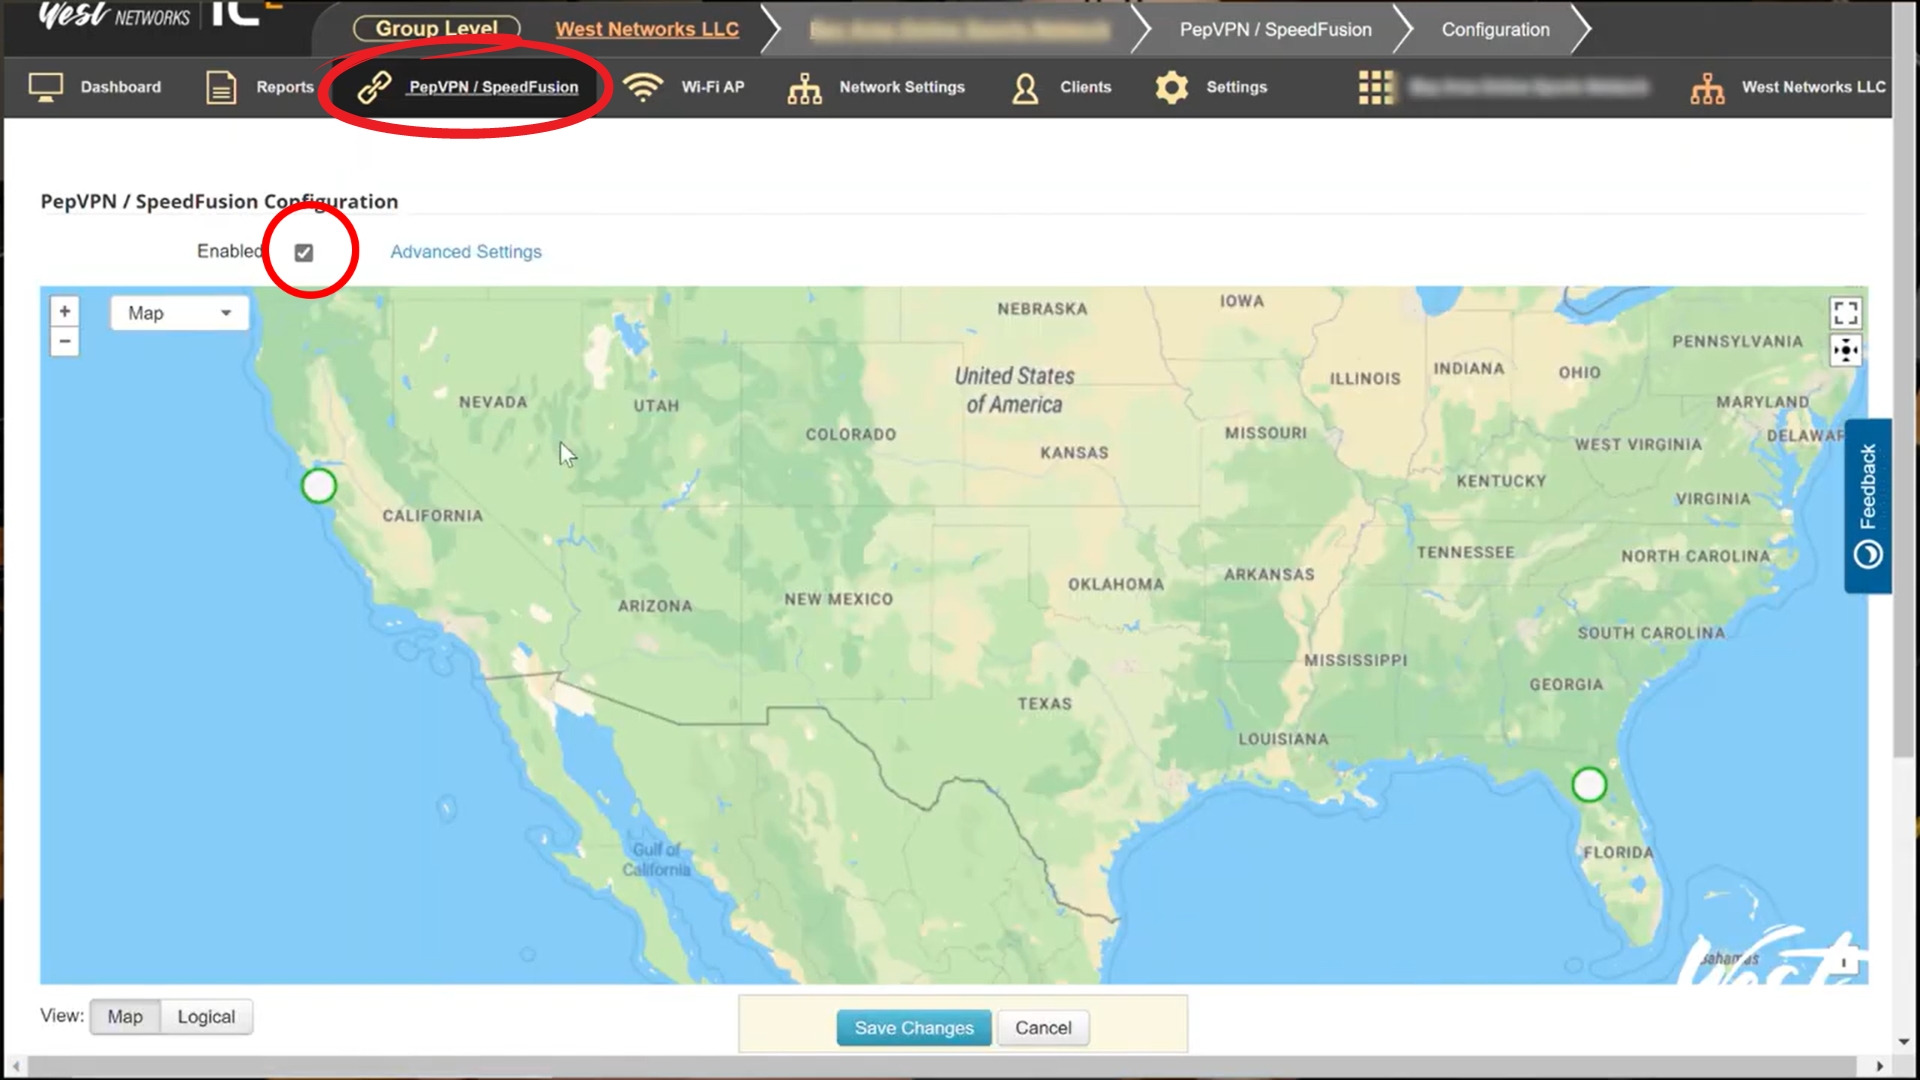
- Go back to group settings, in the menu go to PepVPN/SpeedFusion and click configuration
- Enable SpeedFusion Bonding by clicking the checkbox
- Scroll down and select 'Add Profile', select Star and click Next
- Then you will want to choose your Balance 20X as your Device
- Remove all public IP's from "Hub device IP Addresses / Host Names" and keep the 20xdemo.mypep.link

- After you click Next, in End Point Devices, he will select the MBX by clicking the checkbox, then click Next
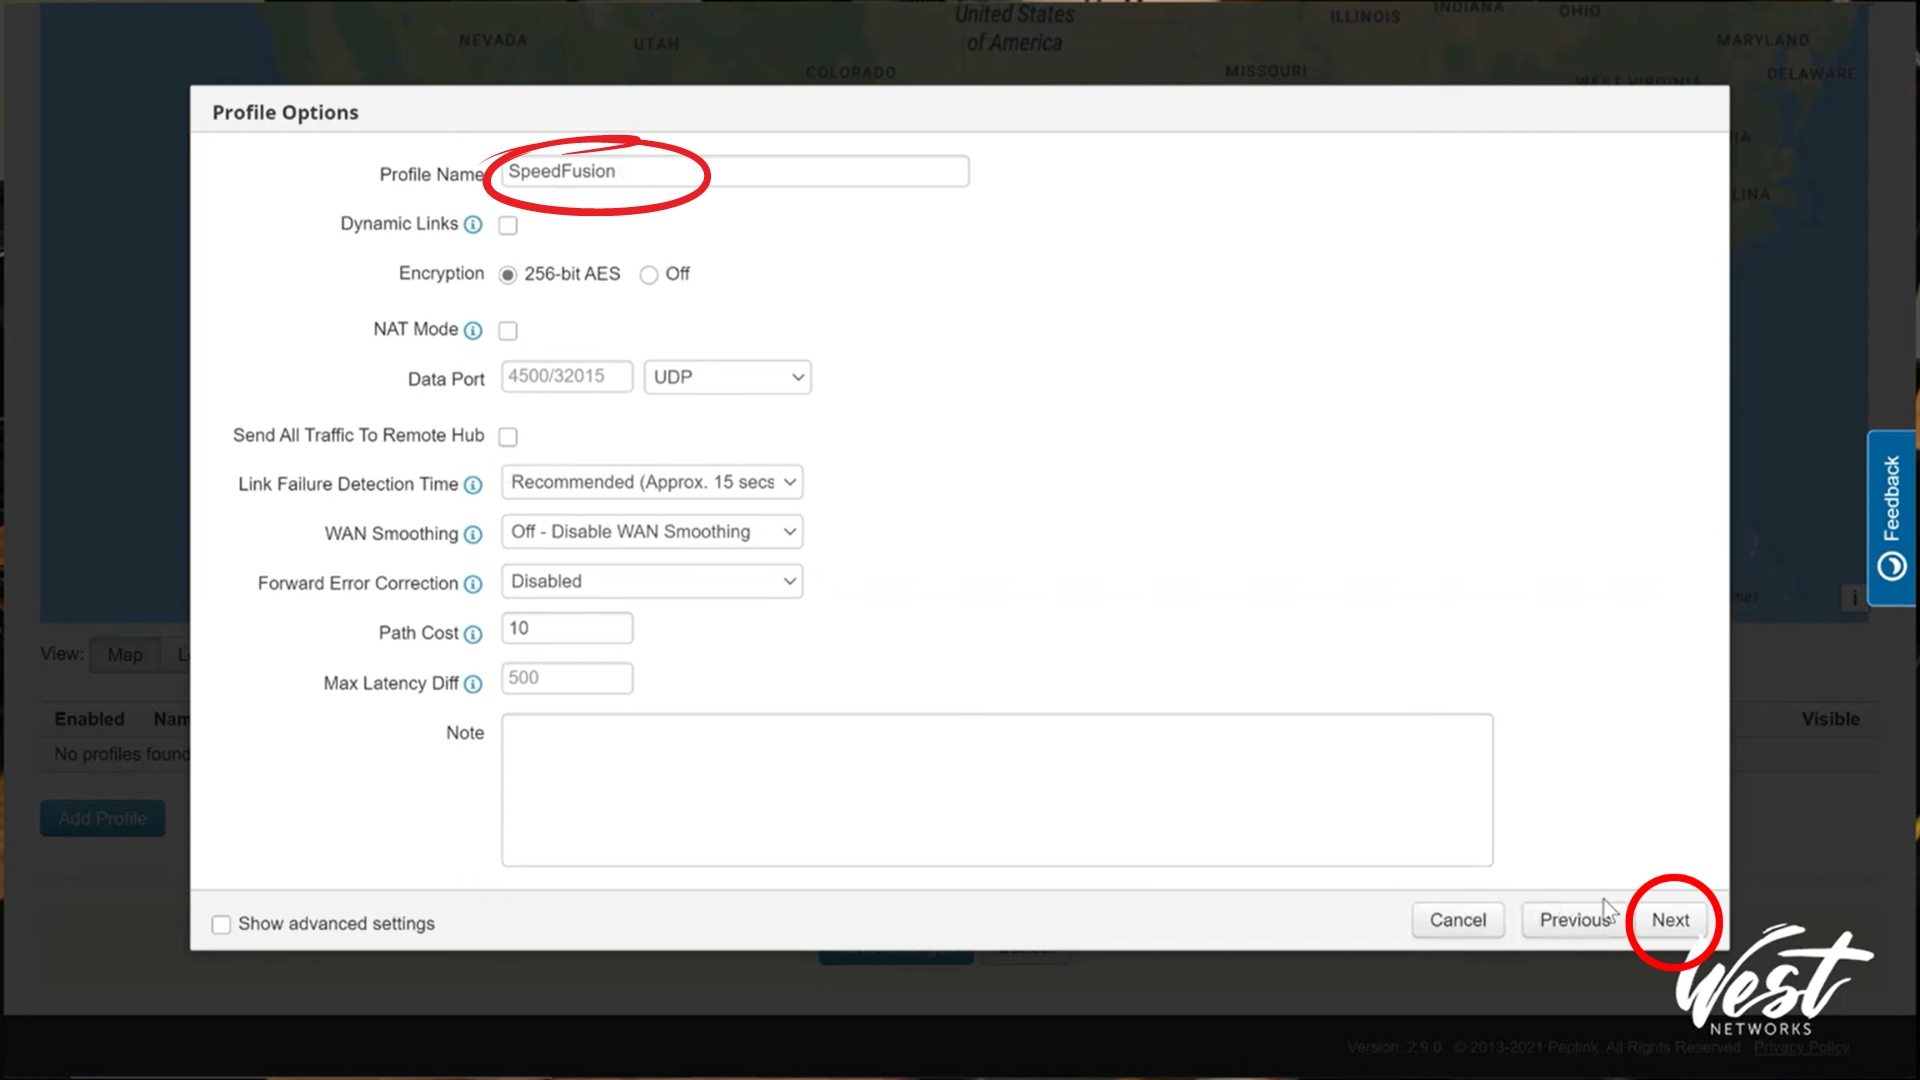
- In Profile Options, set Profile Name to SpeedFusion. Then click Next, Finish, and then Save.
Finished
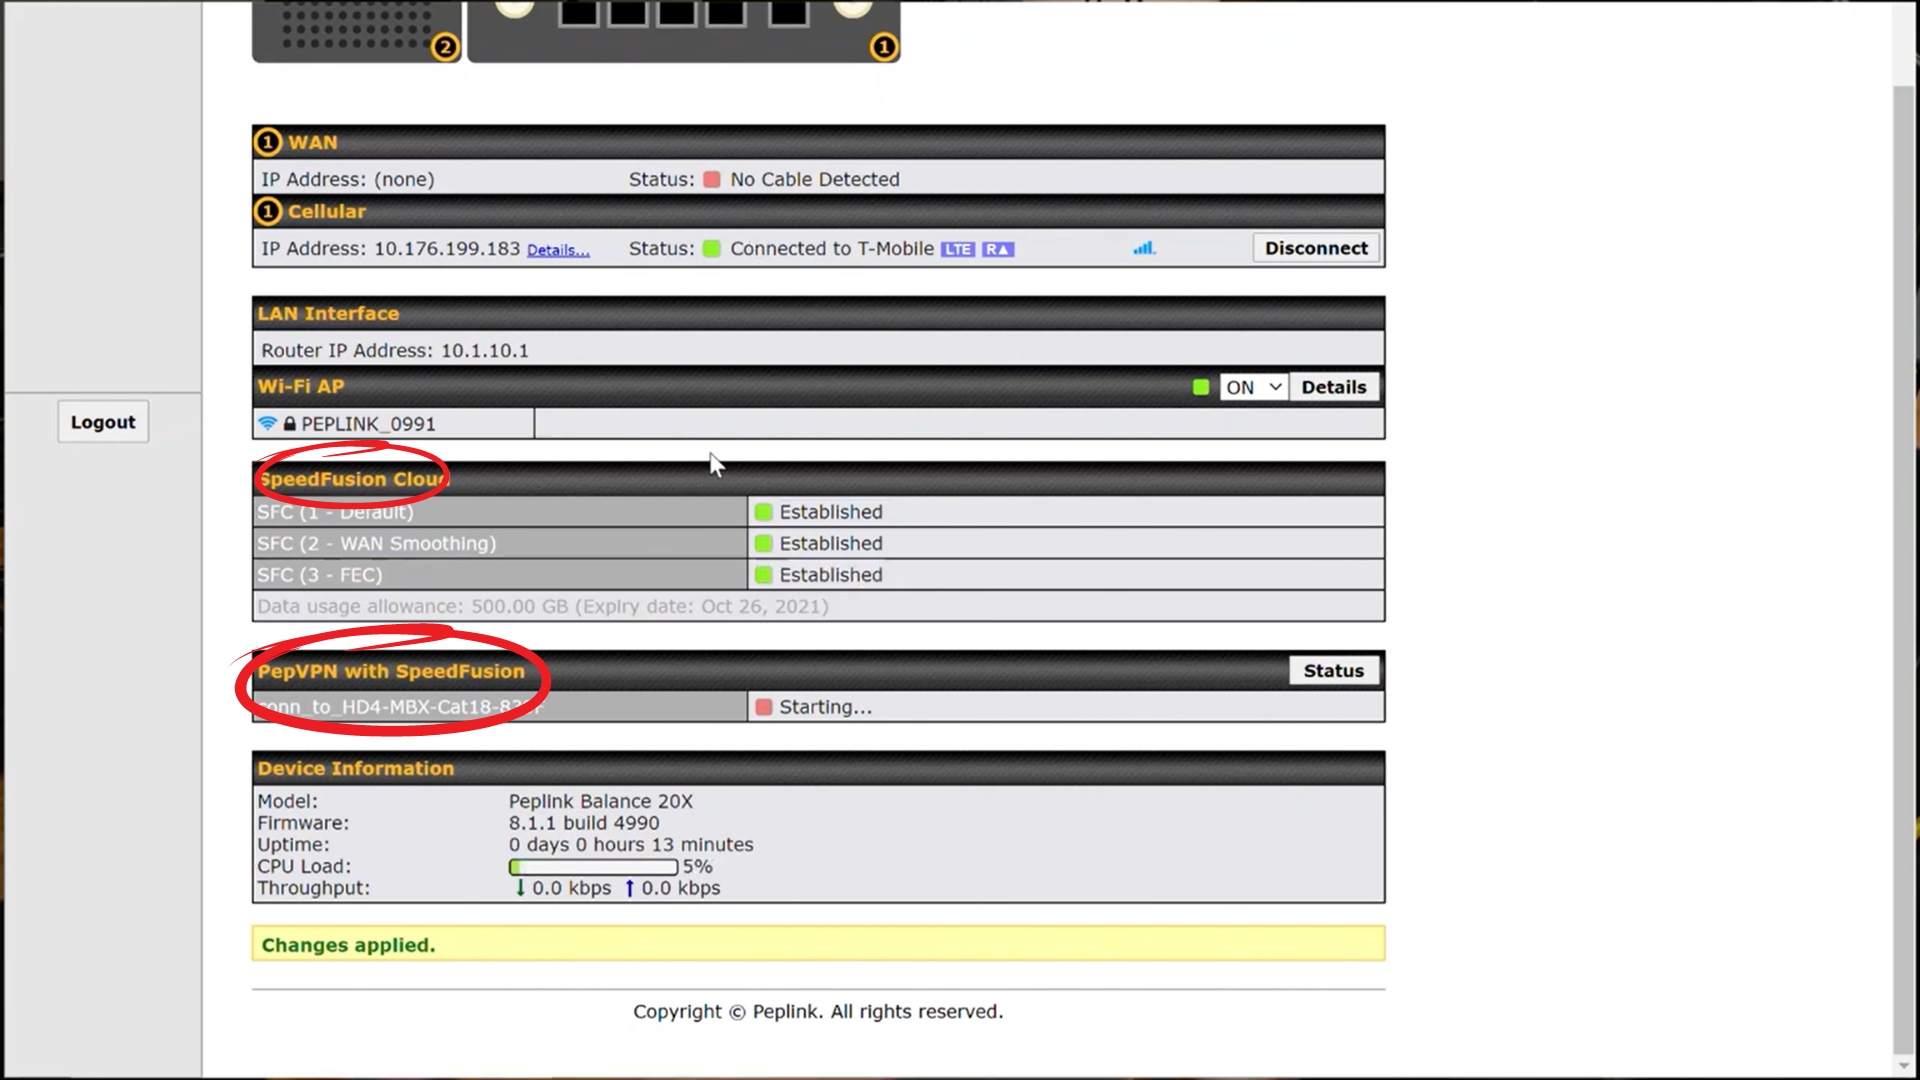
- Now, go back to the Balance 20X and refresh the page. You should now have two sets of tunnels, SpeedFusion Cloud and PepVPN with SpeedFusion.


